This article explains the steps and process for integrating your Dial800 account with HubSpot. Dial800’s open API allows for seamless integration of your inbound campaign data into HubSpot so your call information can be viewed in one spot along with your customer data.
This process will require you to frequently go between HubSpot and Dial800 – we recommend you have two browser windows open to quickly and easily toggle between them.
Need to get to a HubSpot integration step quickly? Go to:
- Step 1: Creating Your HubSpot Developers Account
- Step 2: Setting Up Your Integration
- Step 3: Creating a Realtime Event for HubSpot Integration
- Step 4: Test Your HubSpot Integration
What is HubSpot & How Does it Help Track Your Data?
HubSpot is a sales, marketing, and CRM software. It can be used to create custom records, create and manage contact lists, schedule and publish social media posts, create landing pages and call to action buttons for your website, and more.
By integrating your HubSpot account with your Dial800 account you can view your call data in one place, easily tie that call data to your existing customer records, and better see more than just your customer’s caller ID with creating your reporting.
Step 1: Creating Your HubSpot Developers Account
If you have an existing HubSpot developer account you can navigate to the HubSpot Developer Home Page, click on Manage Apps and then on next page click Create App. This will take you to Step 2 below.
If you need to create an account, follow these steps:
- Go to https://developers.hubspot.com and click on Create a Developer Account
- Under the An app column, click on Create App Developer Account
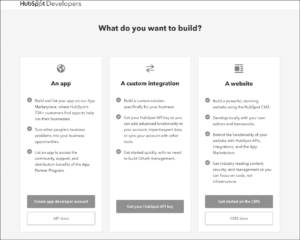
- Click on Create an Account, complete the HubSpot Questionnaire, then click Finish Setup
- On the Welcome to HubSpot App Development window click on the middle option, Build Something for One Account
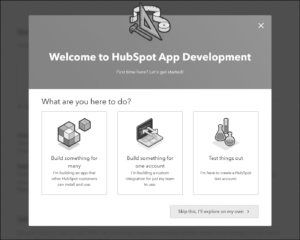
- Click Create an App
- Click Skip if you receive the pop-ups for Your App is Registered and then Skip for Now
Step 2: Setting Up Your Integration
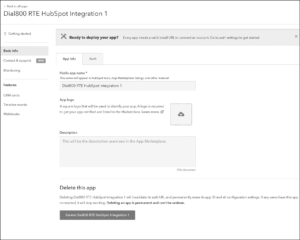
- Still in HubSpot, click Basic Info in left-hand column
- Under Public App Name, change the name to a descriptive name such as “Dial800 RTE HubSpot Integration 1” and click Save
- Click on the Auth tab
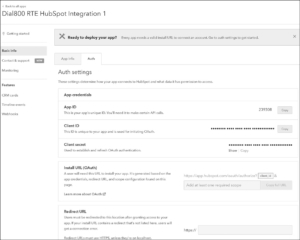
- Enter [apps-v3.dial800.com/Accuroute/Integrations/Default], without the brackets, into the Redirect URL field.
- Click the dropdown list under Scopes and check the boxes for Contacts, Create Timeline Events, and Basic OAuth Functionality
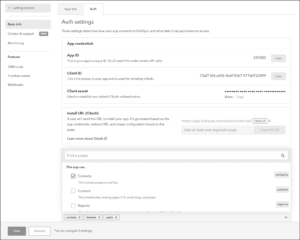
- Click Save
- While keeping the HubSpot window open, open a second browser window or tab and go to your Dial800 Dashboard at https://apps-v3.dial800.com
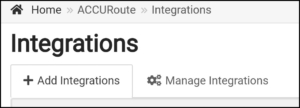
- Click on the AccuRoute® tab at the top of the screen
- Click on the Integrations Panel
- Click the Configure HubSpot button on the HubSpot Panel

- Under Integration Name, enter the same name as your Public App Name on the HubSpot page (for this guide we are using Dial800 RTE HubSpot Integration 1)

- Go back to your HubSpot browser window or tab, and on the Auth tab click the copy button after Client ID (hidden here) and paste it in the Client ID space on the Dial800 page
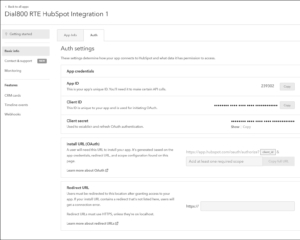
- Go back to the Auth tab on the HubSpot page and under Client Secret, click Show and then Copy, then paste it to the Client Secret space on the Dial800 page
- Click Authorize – then the HubSpot Accounts Page will open
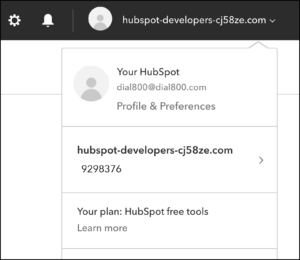
- Click on the HubSpot Developers account name (the blue words themselves, not the Open or Pin options that appear when you scroll over the name), making sure that if you have more than one account listed you click on the one matching your Developer ID under the Domain column.
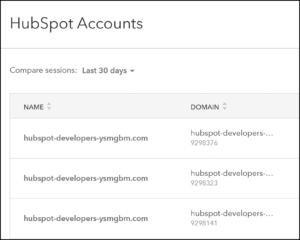
- Your developer ID is found on the top right hand account dropdown menu on HubSpot
- Click Connect App
- Confirm Authorization of Application by checking the captcha box, this will return you back to the AccuRoute Integrations page
- Click on the Manage Integrations tab in the top left, it should say Authorized under Status for your HubSpot integration

Step 3: Creating a Realtime Event for HubSpot Integration
- On the Dial800 platform, click AccuRoute
- Select Real Time Events
- Click the Create New Real-Time Event Button
- In the Settings tab:
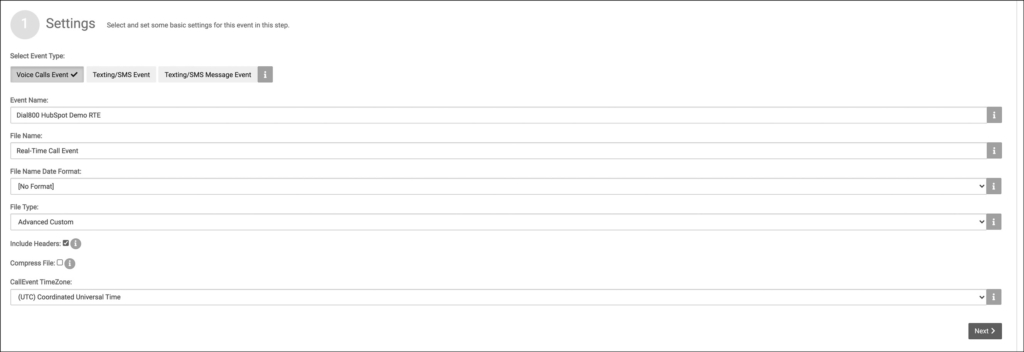
- Select Voice Calls Event as Event Type
- Enter Event Name
- File Name can be left as is
- File Name Date Format can be left as is
- Change File Type to JSON
- Check Include Headers
- Uncheck Compress File
- Set time zone UTC
- Click Next
- In the Filters tab:
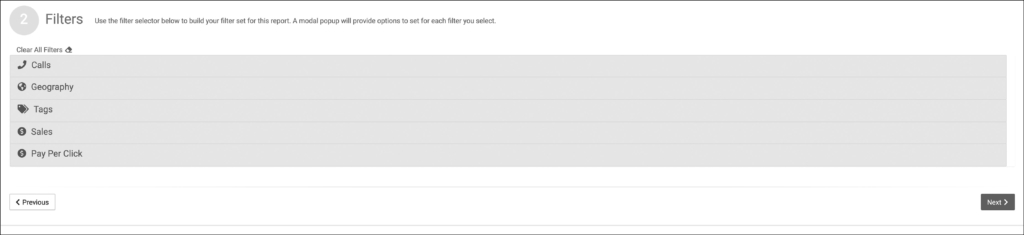
- Enter desired Filters, if any
- Click Next
- In the Options tab:
- Click Advanced
- Add your Template Data Items
- Click Next
- In the Destination Tab:
- Destination Type is Custom Integration
- Select HubSpot Integration (Standard) under Integration
- Check Vendor Integration
- Select Integration Credentials
- Select your Vendor Integration from the drop-down list
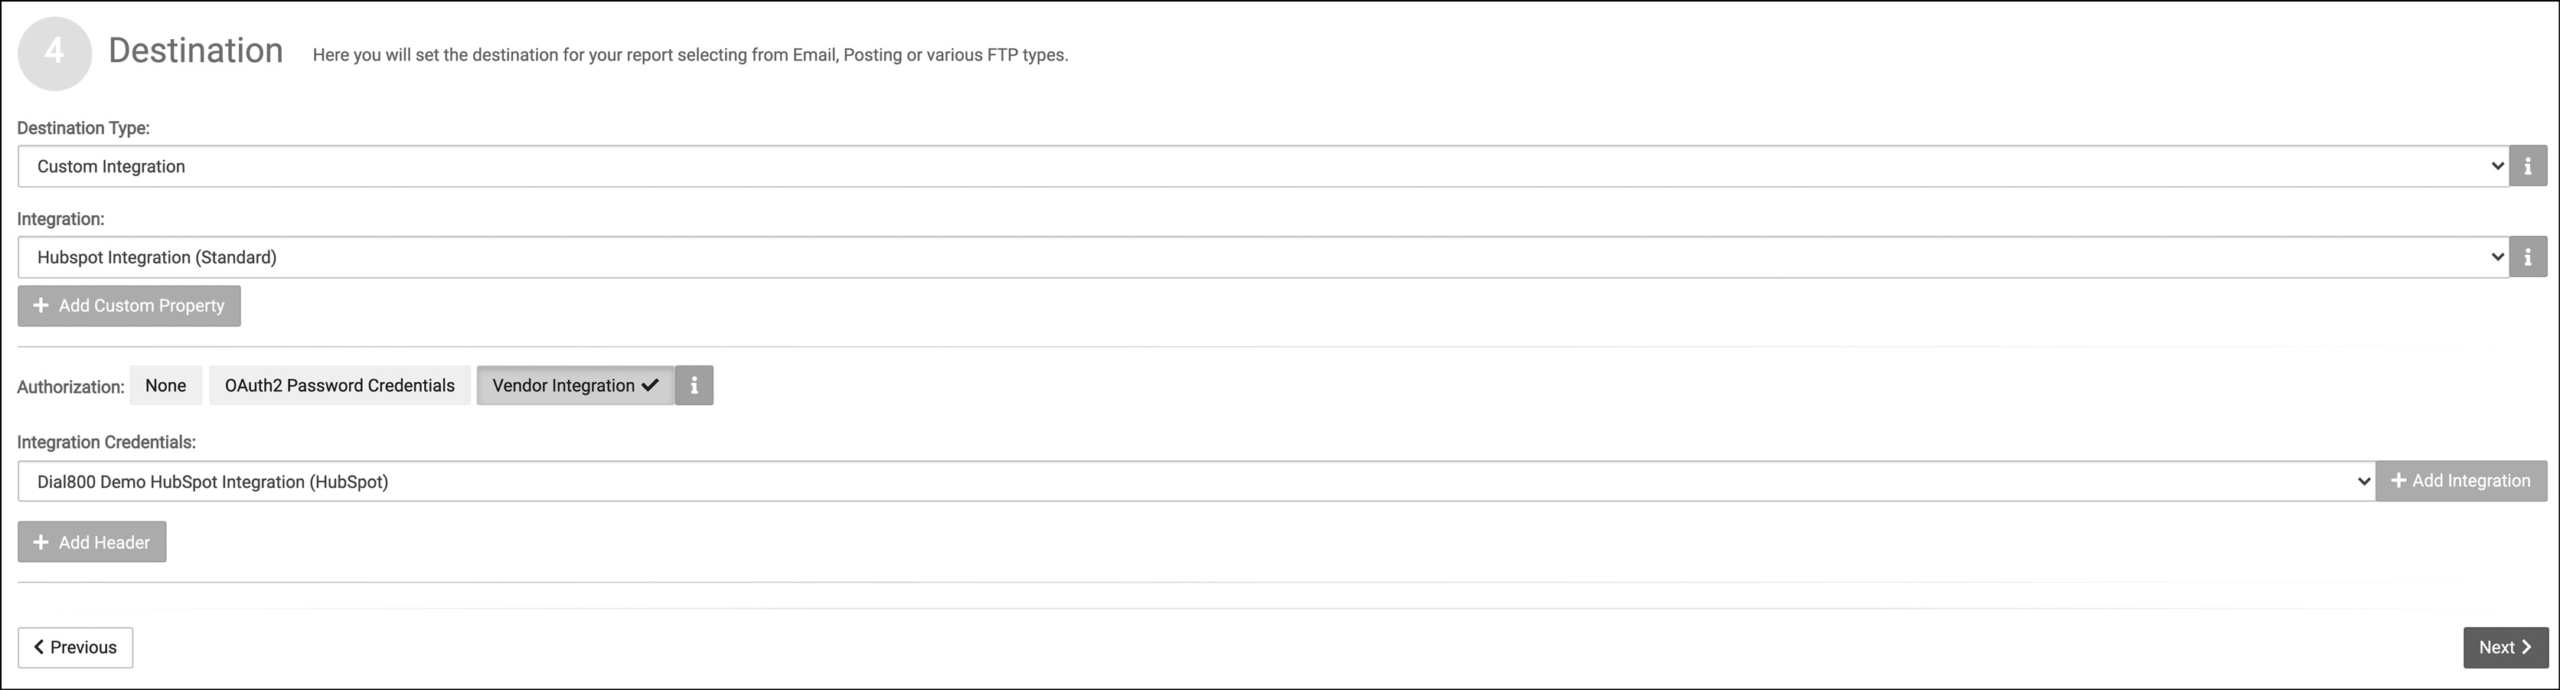
- Select your Vendor Integration from the drop-down list
- Click Next to Confirm
- Click Finish
Step 4: Test Your HubSpot Integration
- In your HubSpot account, click Go to My Account
- Click Dial800
- Click Contacts > Contacts
- Make a test call to a number in the Filters, Calls, Target Numbers of the RTE
- Refresh Contacts page
- You should see the call in your HubSpot contacts
Your HubSpot and Dial800 accounts are successfully integrated. If you have any more questions or need help, you can contact Dial800 Customer Care or call 1-800-DIAL800.
 CallView360®
 AI Analytics
 AccuRoute®
 BizCloud
 RapidRecall®
 Integrations