This article walks you through how to add call queues, also called agent queues, to routing profiles in AccuRoute®. This allows you to direct calls to the correct queue in your routing system.
How Do Dial800 Call Queues Work?
Within Dial800, routing profiles define the flow of logic and prompts that an inbound call will progress through. These routing rules and profiles help your calls get to the correct target.
Before you can add a queue to your routing profile, you need to create the queue. This Call Queue Properties article explains all the different queue options and walks you through the steps of setting it up.
Adding a Call Queue to Your Routing Profile
Follow these steps to add a queue to your routing profile:
- First, make sure you have created your call queue
- Once the queue is created, navigate to AccuRoute and select Routing
- When creating a new routing profile, click + New Profile, give your routing profile a name, and click Create; if you are adding an agent queue to a current routing profile, click Designer on the profile you wish to edit
- Click the Inbound Call action icon that looks like a home plate
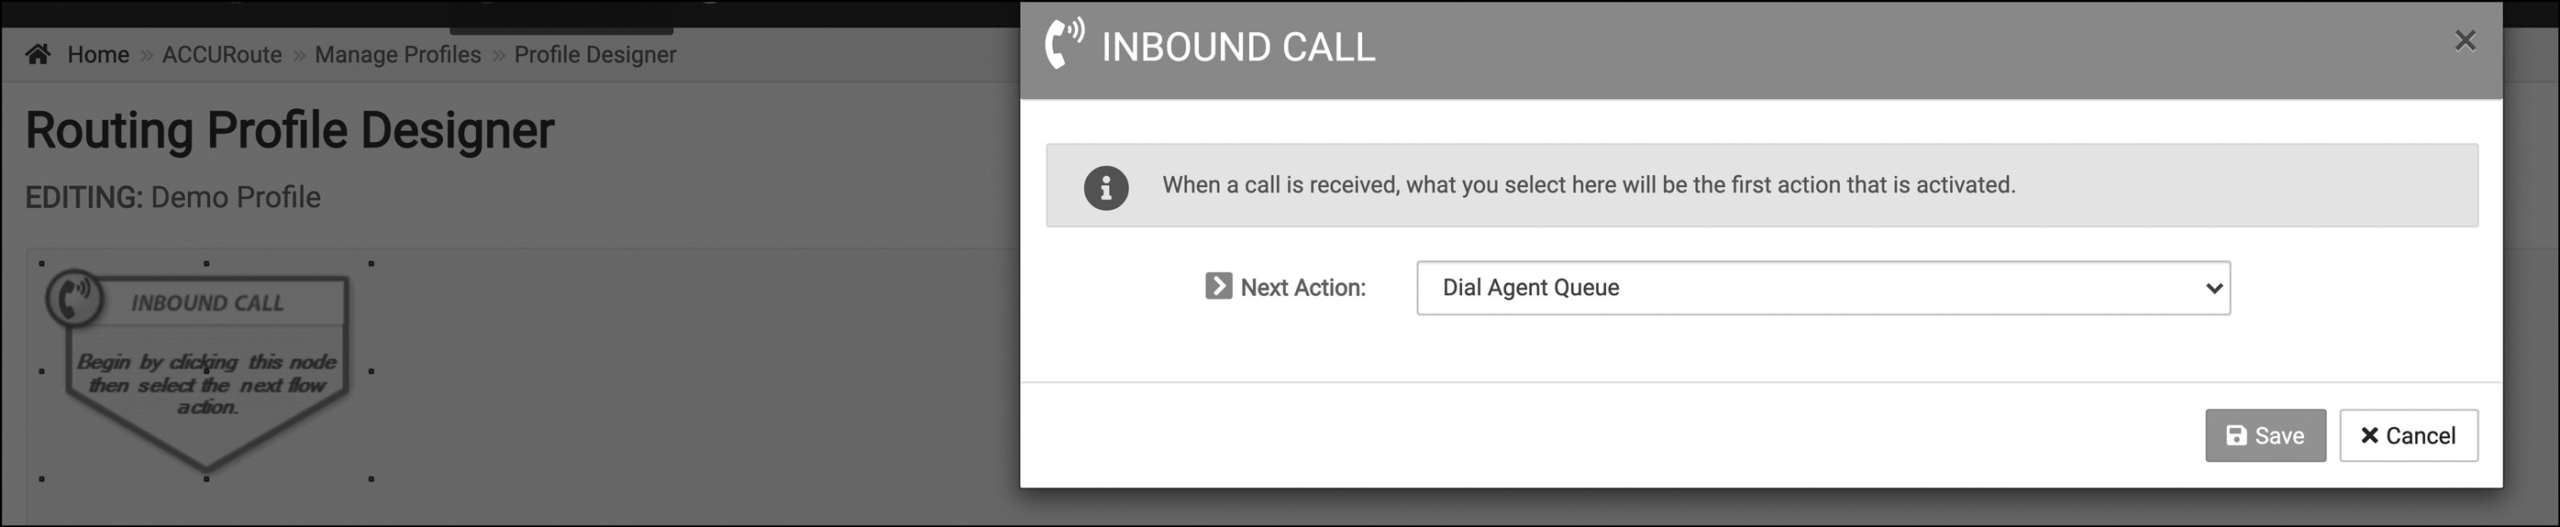
- From the Next Action drop-down menu, select Dial Agent Queue
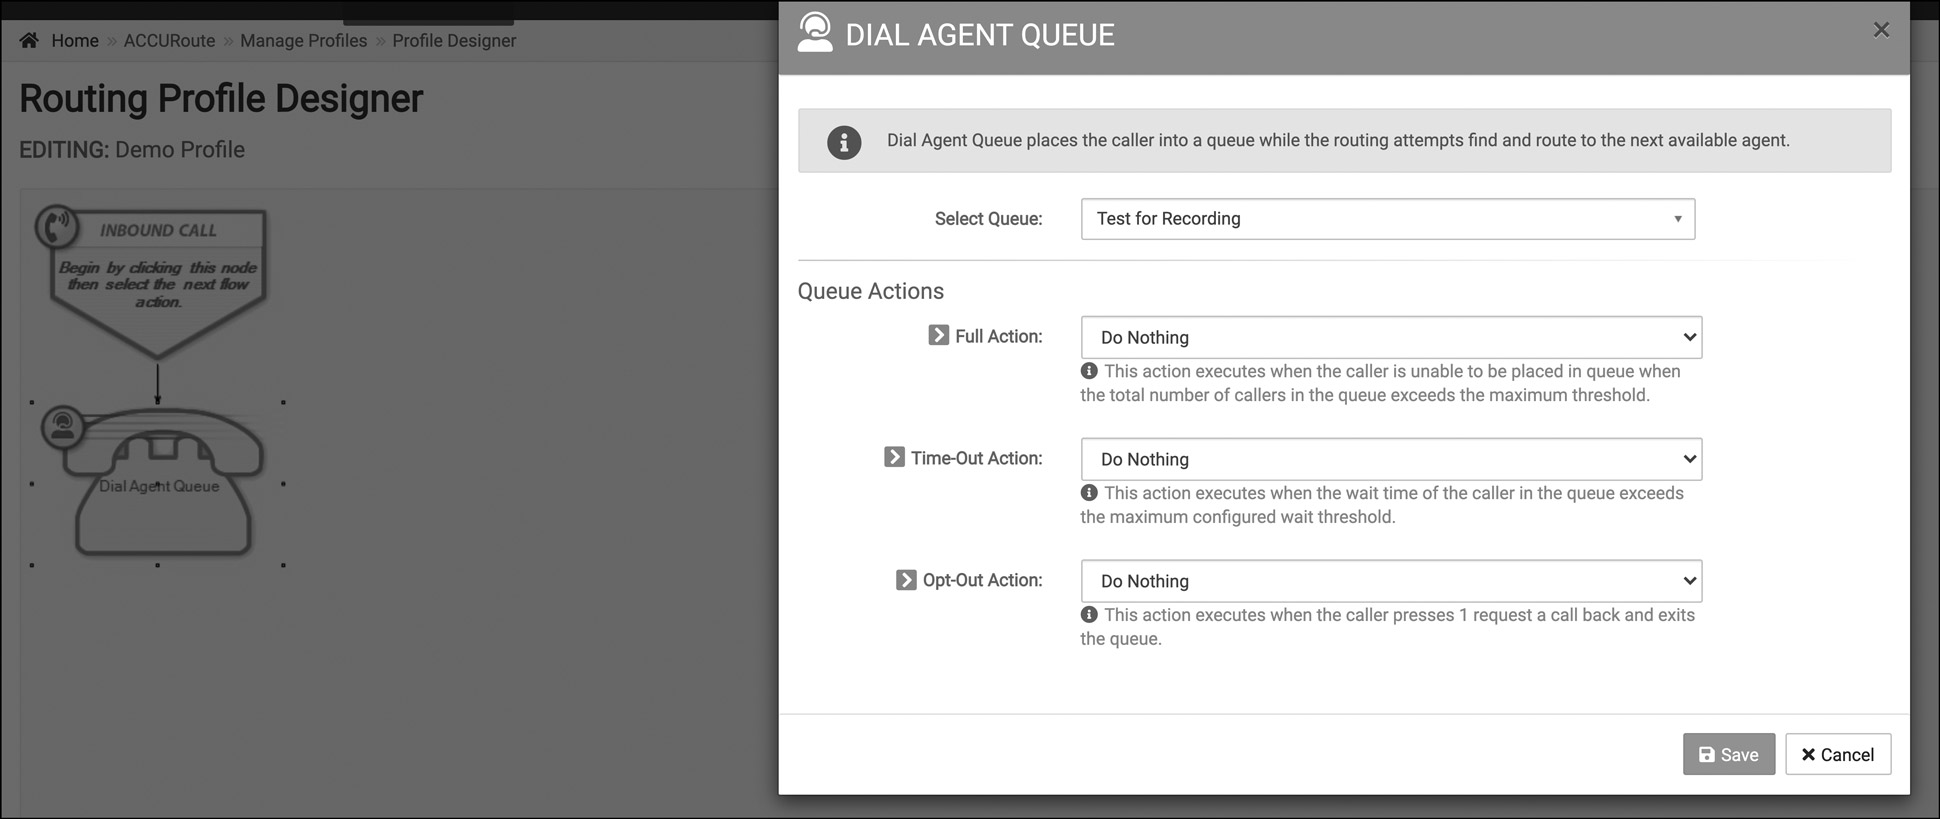
- Select the phone action icon for Dial Agent Queue and choose your optional Queue Actions
- When done, click Save and then Save Profile to complete your new Agent Queue Routing
Opt-Out Action for Caller Call Back
Follow these steps to set up the optional call back feature if you did not select it when creating your queue. You will need to create an audio for the prompt telling the caller enter the phone number they wish to receive a call back on, and set up a real-time event to report callers who requested a call back.
- Navigate to AccuRoute and select Routing
- Click the Designer button for the routing profile you wish edit
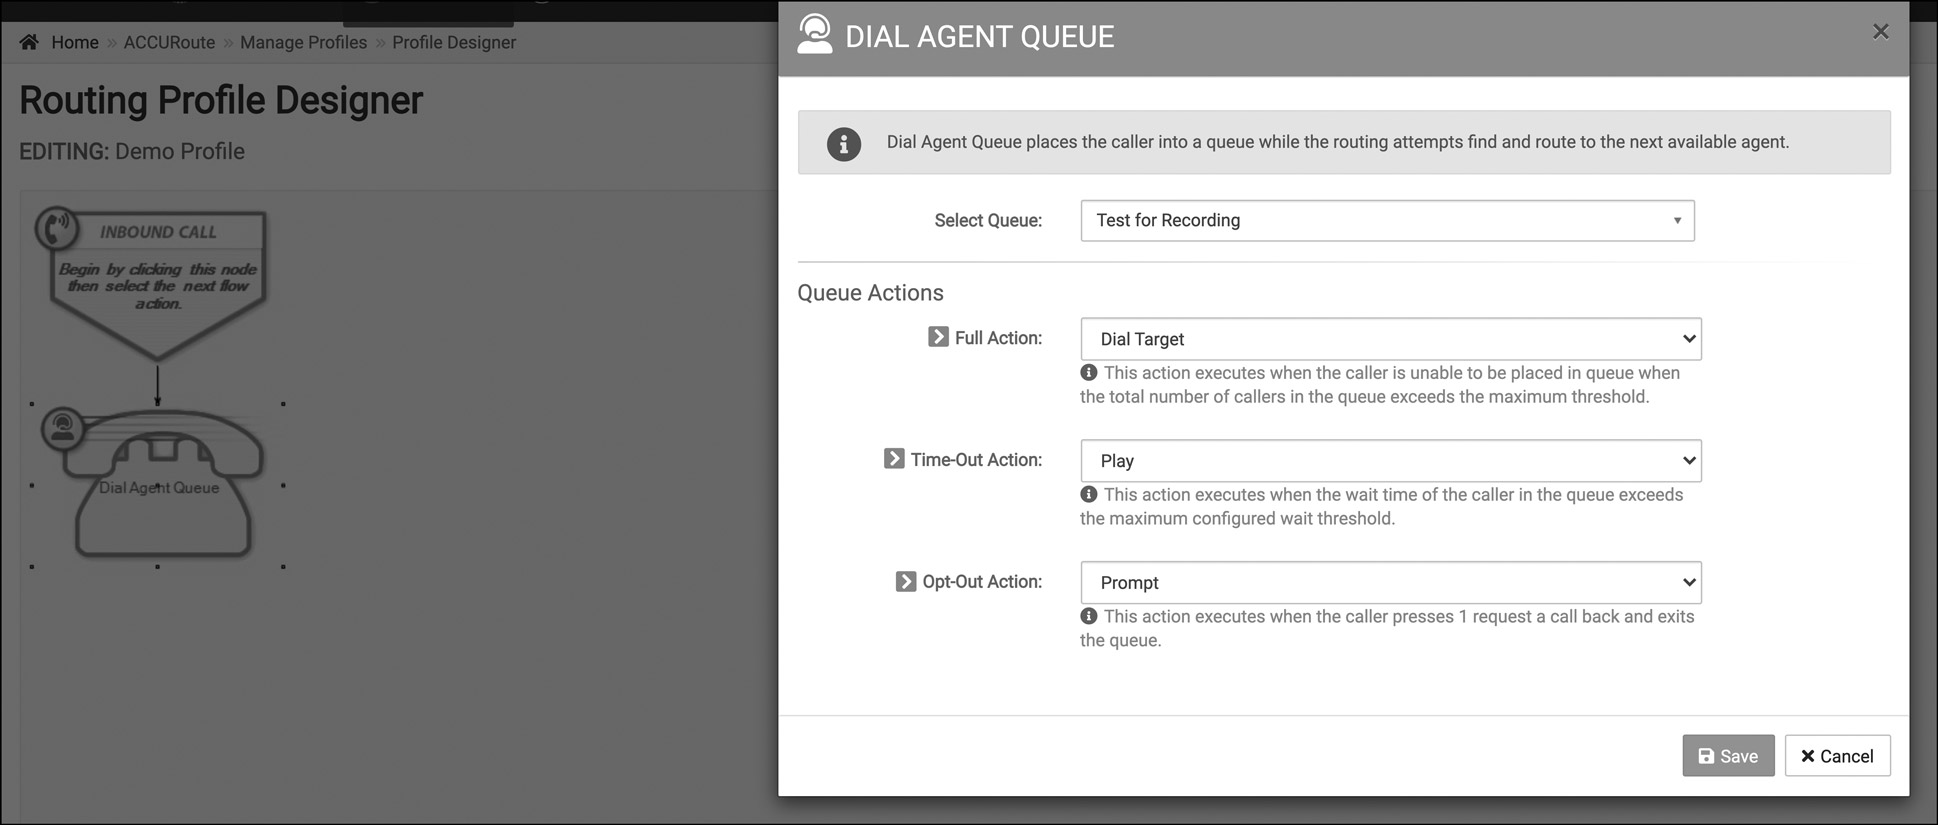
- Click on the Agent Queue phone action icon and select Prompt from the Opt-Out Action drop-down menu – in this example, a full action and time-out action are also selected, but can remain as Do Nothing
- Click the Prompt action icon
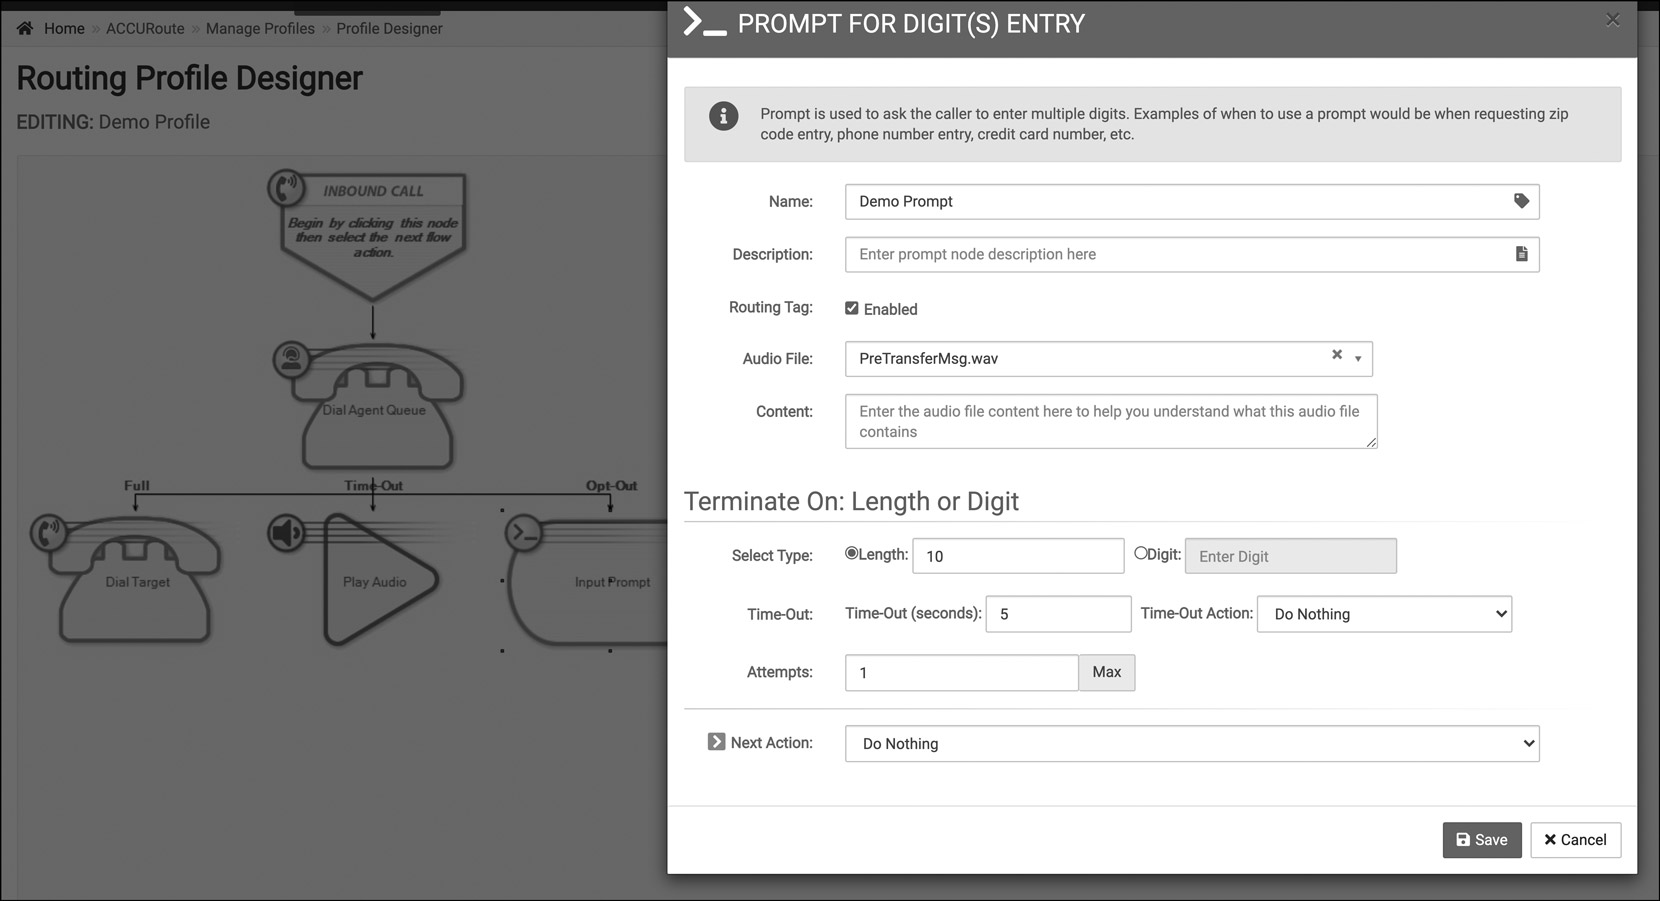
- Add 10 to the length of digits
- Set the minimum Time-out seconds to five
- Enable Routing Tag by checking the box
- Once your action items are filled in, click Save then Save Profile
Your routing profile now has a call queue to receive your inbound calls. If you have any more questions or need help setting up call routing, you can contact Dial800 Customer Care or call 1-800-DIAL800.
 CallView360®
 VoiceInsights AI
 AccuRoute®
 BizCloud
 RapidRecall®
 Integrations