This article walks you through the basic steps for setting up and managing a report in Dial800 in order to see key data and statistics about your incoming calls.
Why Use Reporting?
The reports in CallView360 allows you to create instant or scheduled reports, giving you the specific data you want, when you want it. These can be used to see the overall status of campaigns, the success rate of calls, the activity based on DNIS or target numbers, and much more.
Your reports can be run instantly or on an automated schedule. This flexibility to customize reports helps our clients quickly and easily review important data both when it is convenient for them and when a problem arises that needs their review.
Creating a Report
- Navigate to CallView360
- On the top right of the Dashboard homepage, select Reports

- In the Report Manager page, click the + Create New Report button
- On Step 1: Settings of the report tool you can name the report, name the report file that will be created, select the file type, and change the time zone
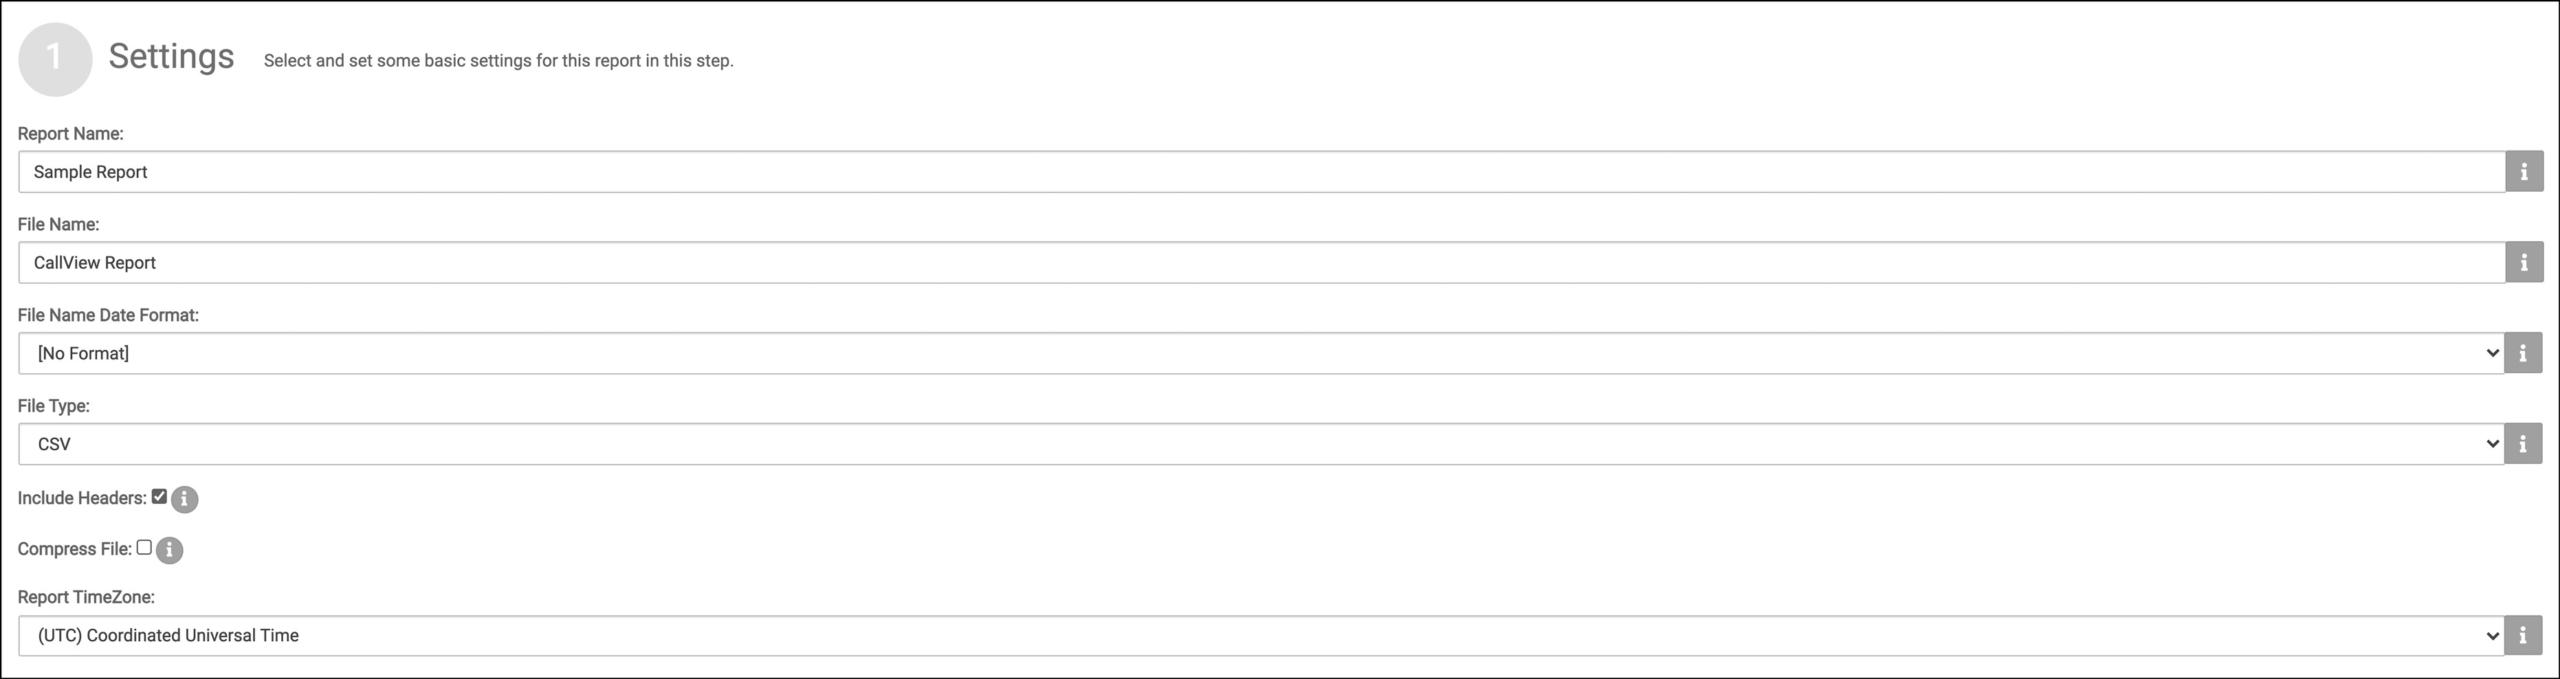
- When you’re done, click Next
- On Step 2: Filters, select the filters on the information you want to report – filter out call information by date, by number identifiers (DNIS, Target, Sentiment, etc.), by geography (postal code, state, etc), by tags (DNIS tags, Target tags, etc.), or by sales (if there was a sale or not)

- When you’re done setting the filters, click Next
- On Step 3: Options, you can choose to use a prestored basic template (selected from the drop down), or you can choose an Advanced template; the basic templates cannot be edited, but work for most of our clients
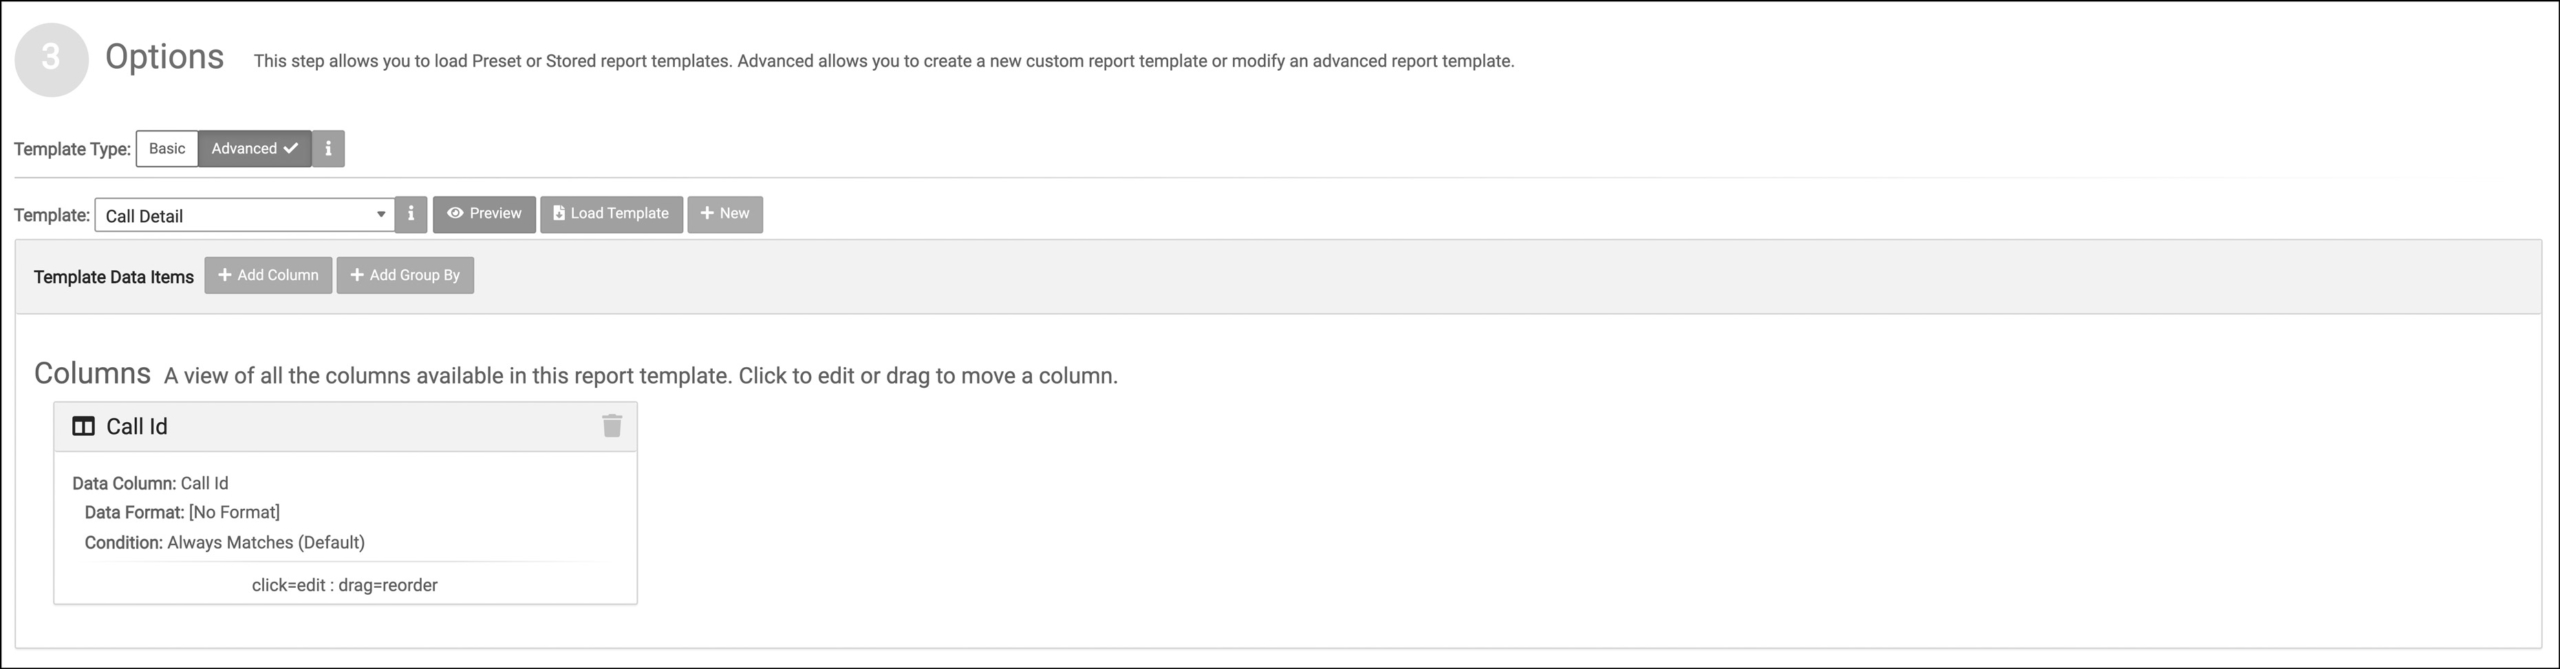
- If you select an Advanced template, click the + New button to begin adding new columns, adjust the name, change the data of the column, and adjust the format of the data
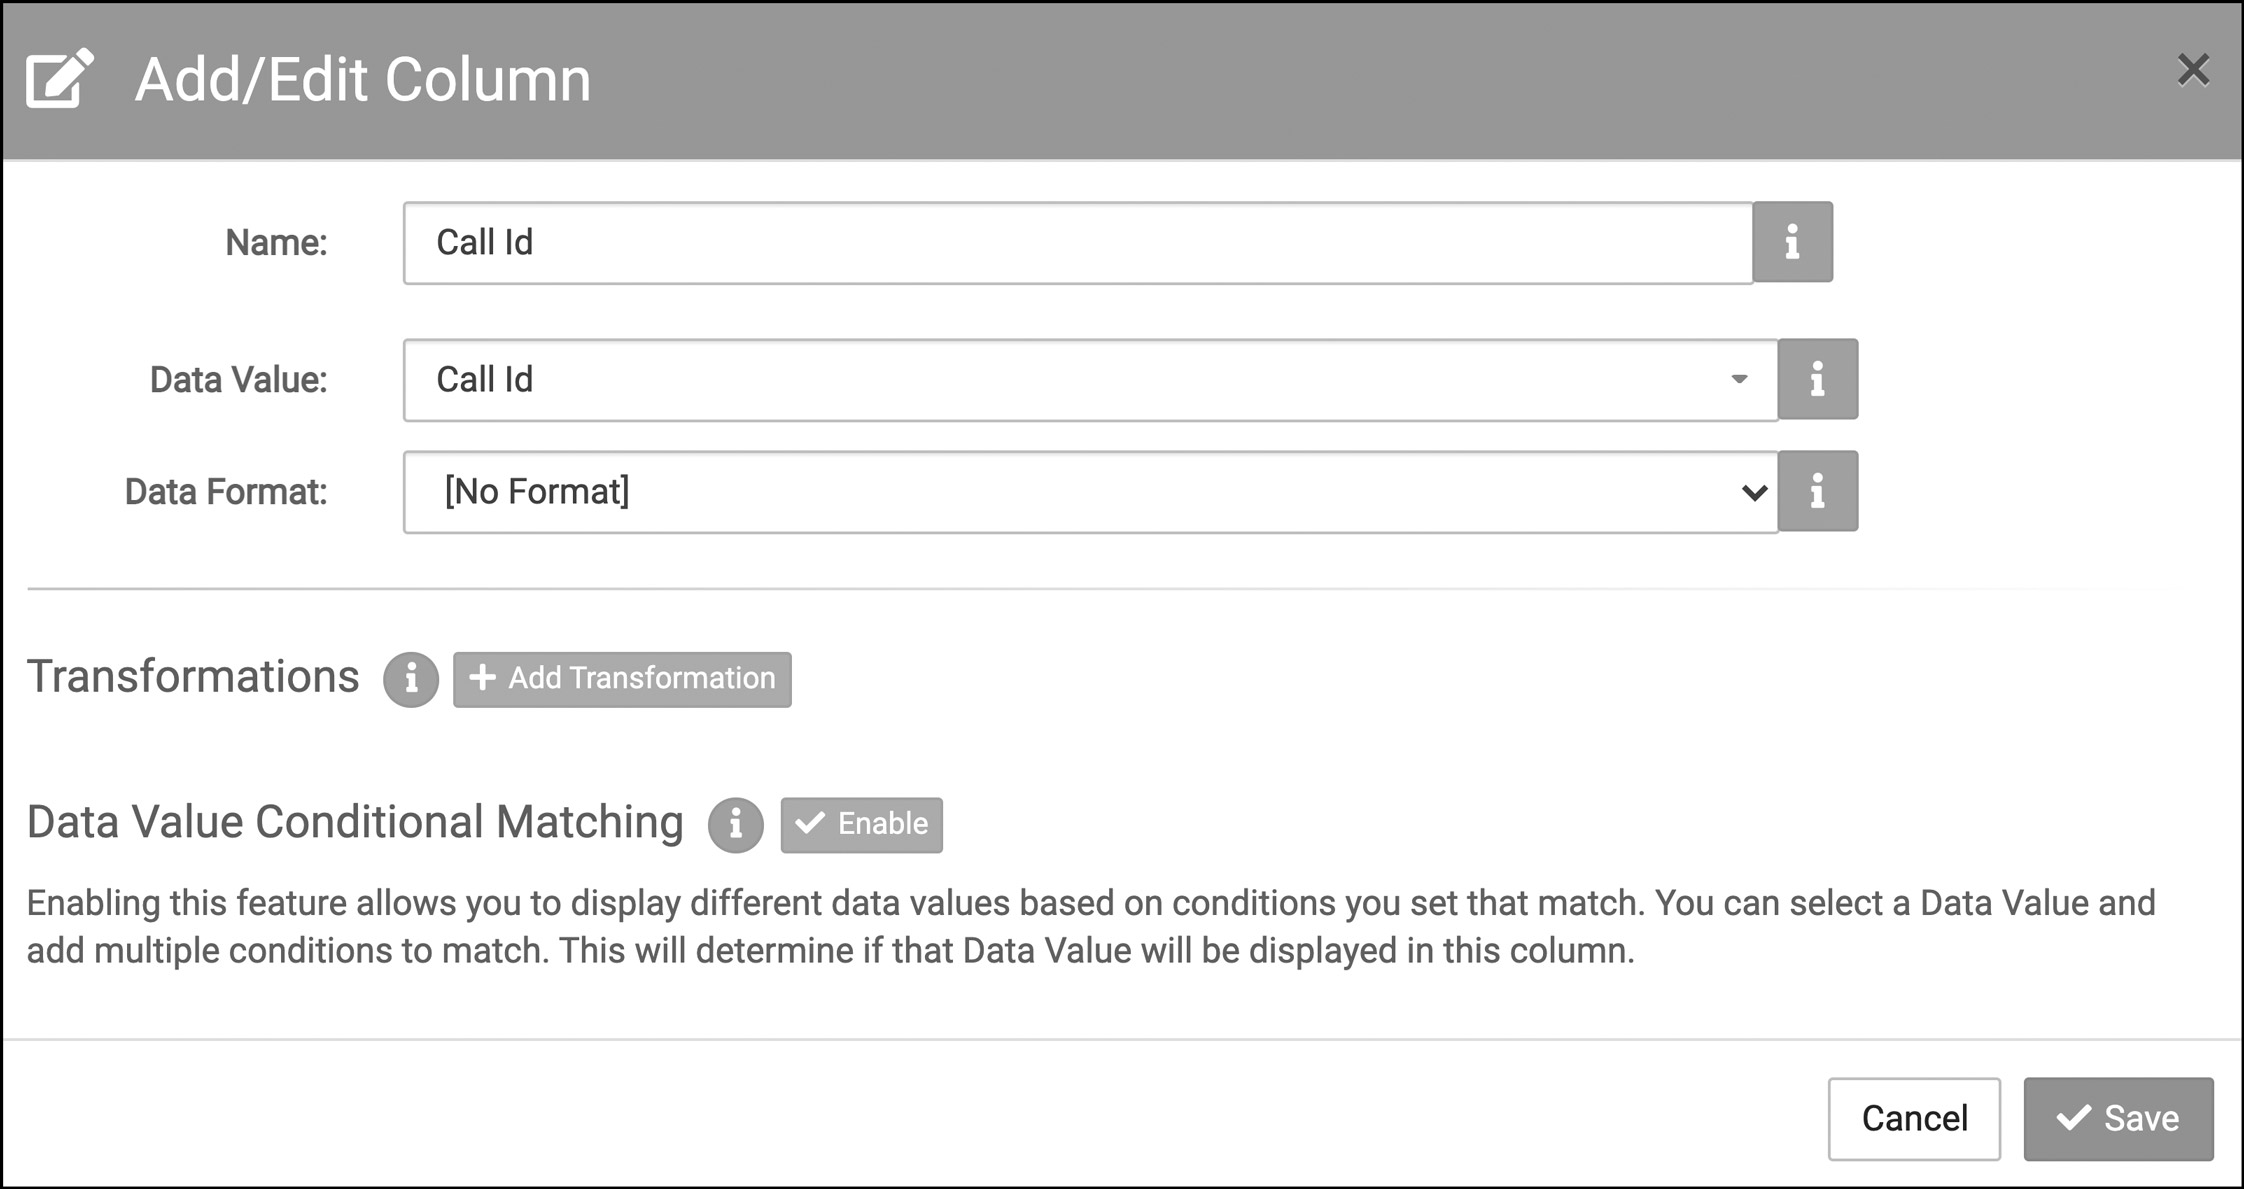
- Transformations and Data Conditional Matching are advanced settings that are often used to manually override information based on specific criteria – learn more about Transformations with this guide
- On Step 4: Destination, choose how and where the report is going to be delivered including email attachment, email body, FTP, FTPS, SFTP, HTTP Post Request, or a custom integration

- On Step 5: Confirmation page, review your information and confirm the report steps are correct.
- In the Step 6 Schedule page, you can schedule the report to run at a certain time or day or you can run the report immediately

- When you’re finished scheduling the report, click Finish
You can revisit the report manager at any time to edit and view your report, to run the report in real time, or delete it

Your reports are now active and ready to review. If you have any more questions or need help, you can contact Dial800 Customer Care or call 1-800-DIAL800.
 CallView360®
 VoiceInsights AI
 AccuRoute®
 BizCloud
 RapidRecall®
 Integrations