This article helps you understand the different types of call and text tags and how to set them up in Dial800. Tags help with call tracking and analytics because they provide more call data for detailed reporting and accurate digital marketing attribution.
What are Call Tags?
Tags are custom attributes within Dial800 that are bound to each call and text record – think of a tag as an additional custom column of data in a call detail report. The different types of tags help give more context and insights to each call and text such as where your call is coming from or what ads are driving calls, texts, and sales.
There are five types of tags you can use in Dial800 to track your campaigns:
- DNIS Tags, which add extra information about the caller
- Target Tags, which add extra information about the target the call was routed to
- Routing Tags, which track information the call enters such as the menu option they selected when prompted by your call routing system
- Web Tags, which can be automatically or manually created to add marketing & digital ad attribution information to your calls
- Voice Tags, which are part of Dial800’s speech analytics Voice Tagging AI to evaluate and report on your calls
Learn more about the different types of call tags in this guide.
CallView360® is used to report call tags and their values, but tags are set up in in several locations within the Dial800 platform depending on which type you are using. We’ll explain the different types below.
Using DNIS Tags
DNIS Tags are attributes that are directly related to the DNIS (the inbound number dialed – this can either be a toll free or local number that you have within your Dial800 account. Follow these steps to create DNIS tags:
- Navigate to AccuRoute and select Tags
- Find and select New Tag (in the middle of the screen)
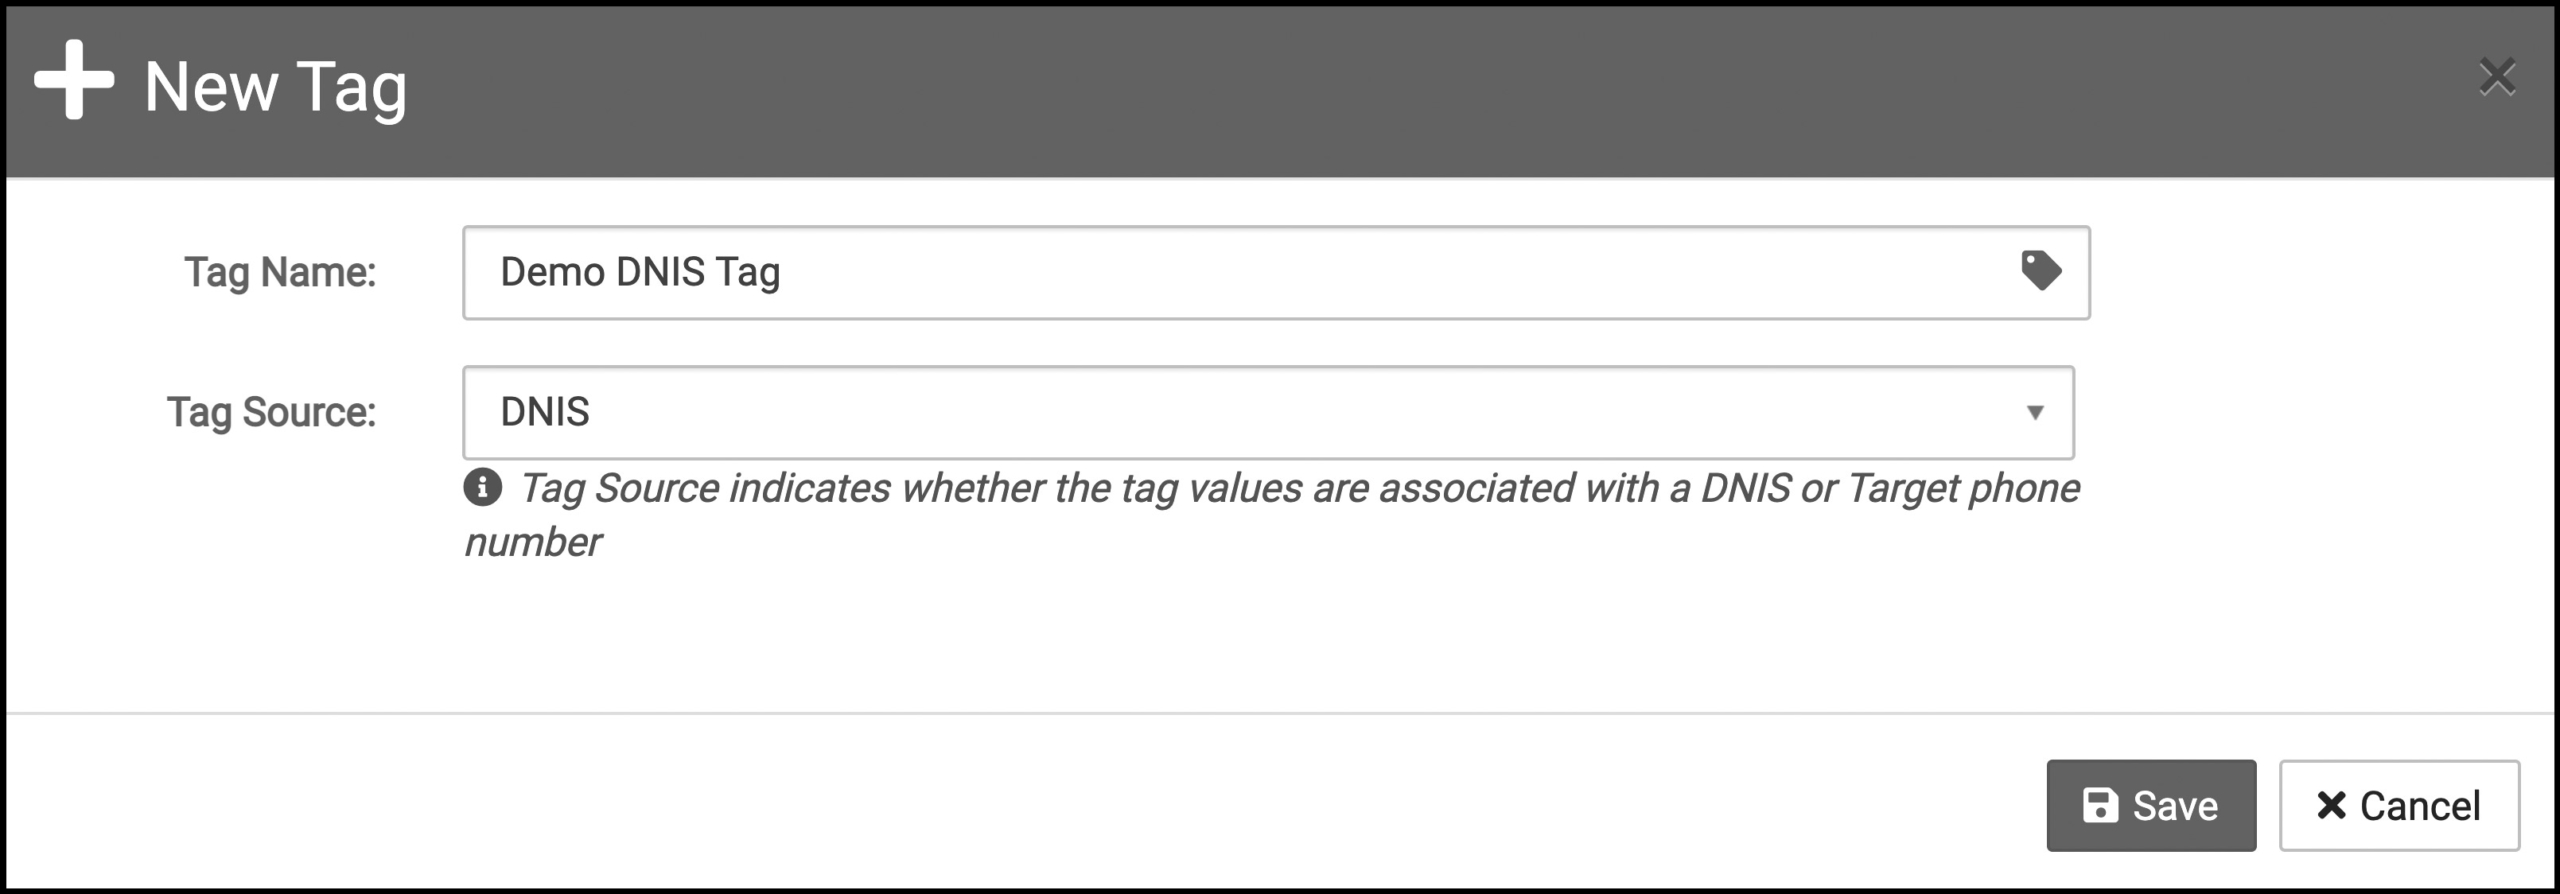
- Set the Tag Name, or the title of the group of tags such as Campaign Name or any naming system that makes sense for your use
- Make sure the tag source is DNIS
- Once the Tag Name is created, click Save
- Click the Values button for the tag you just created
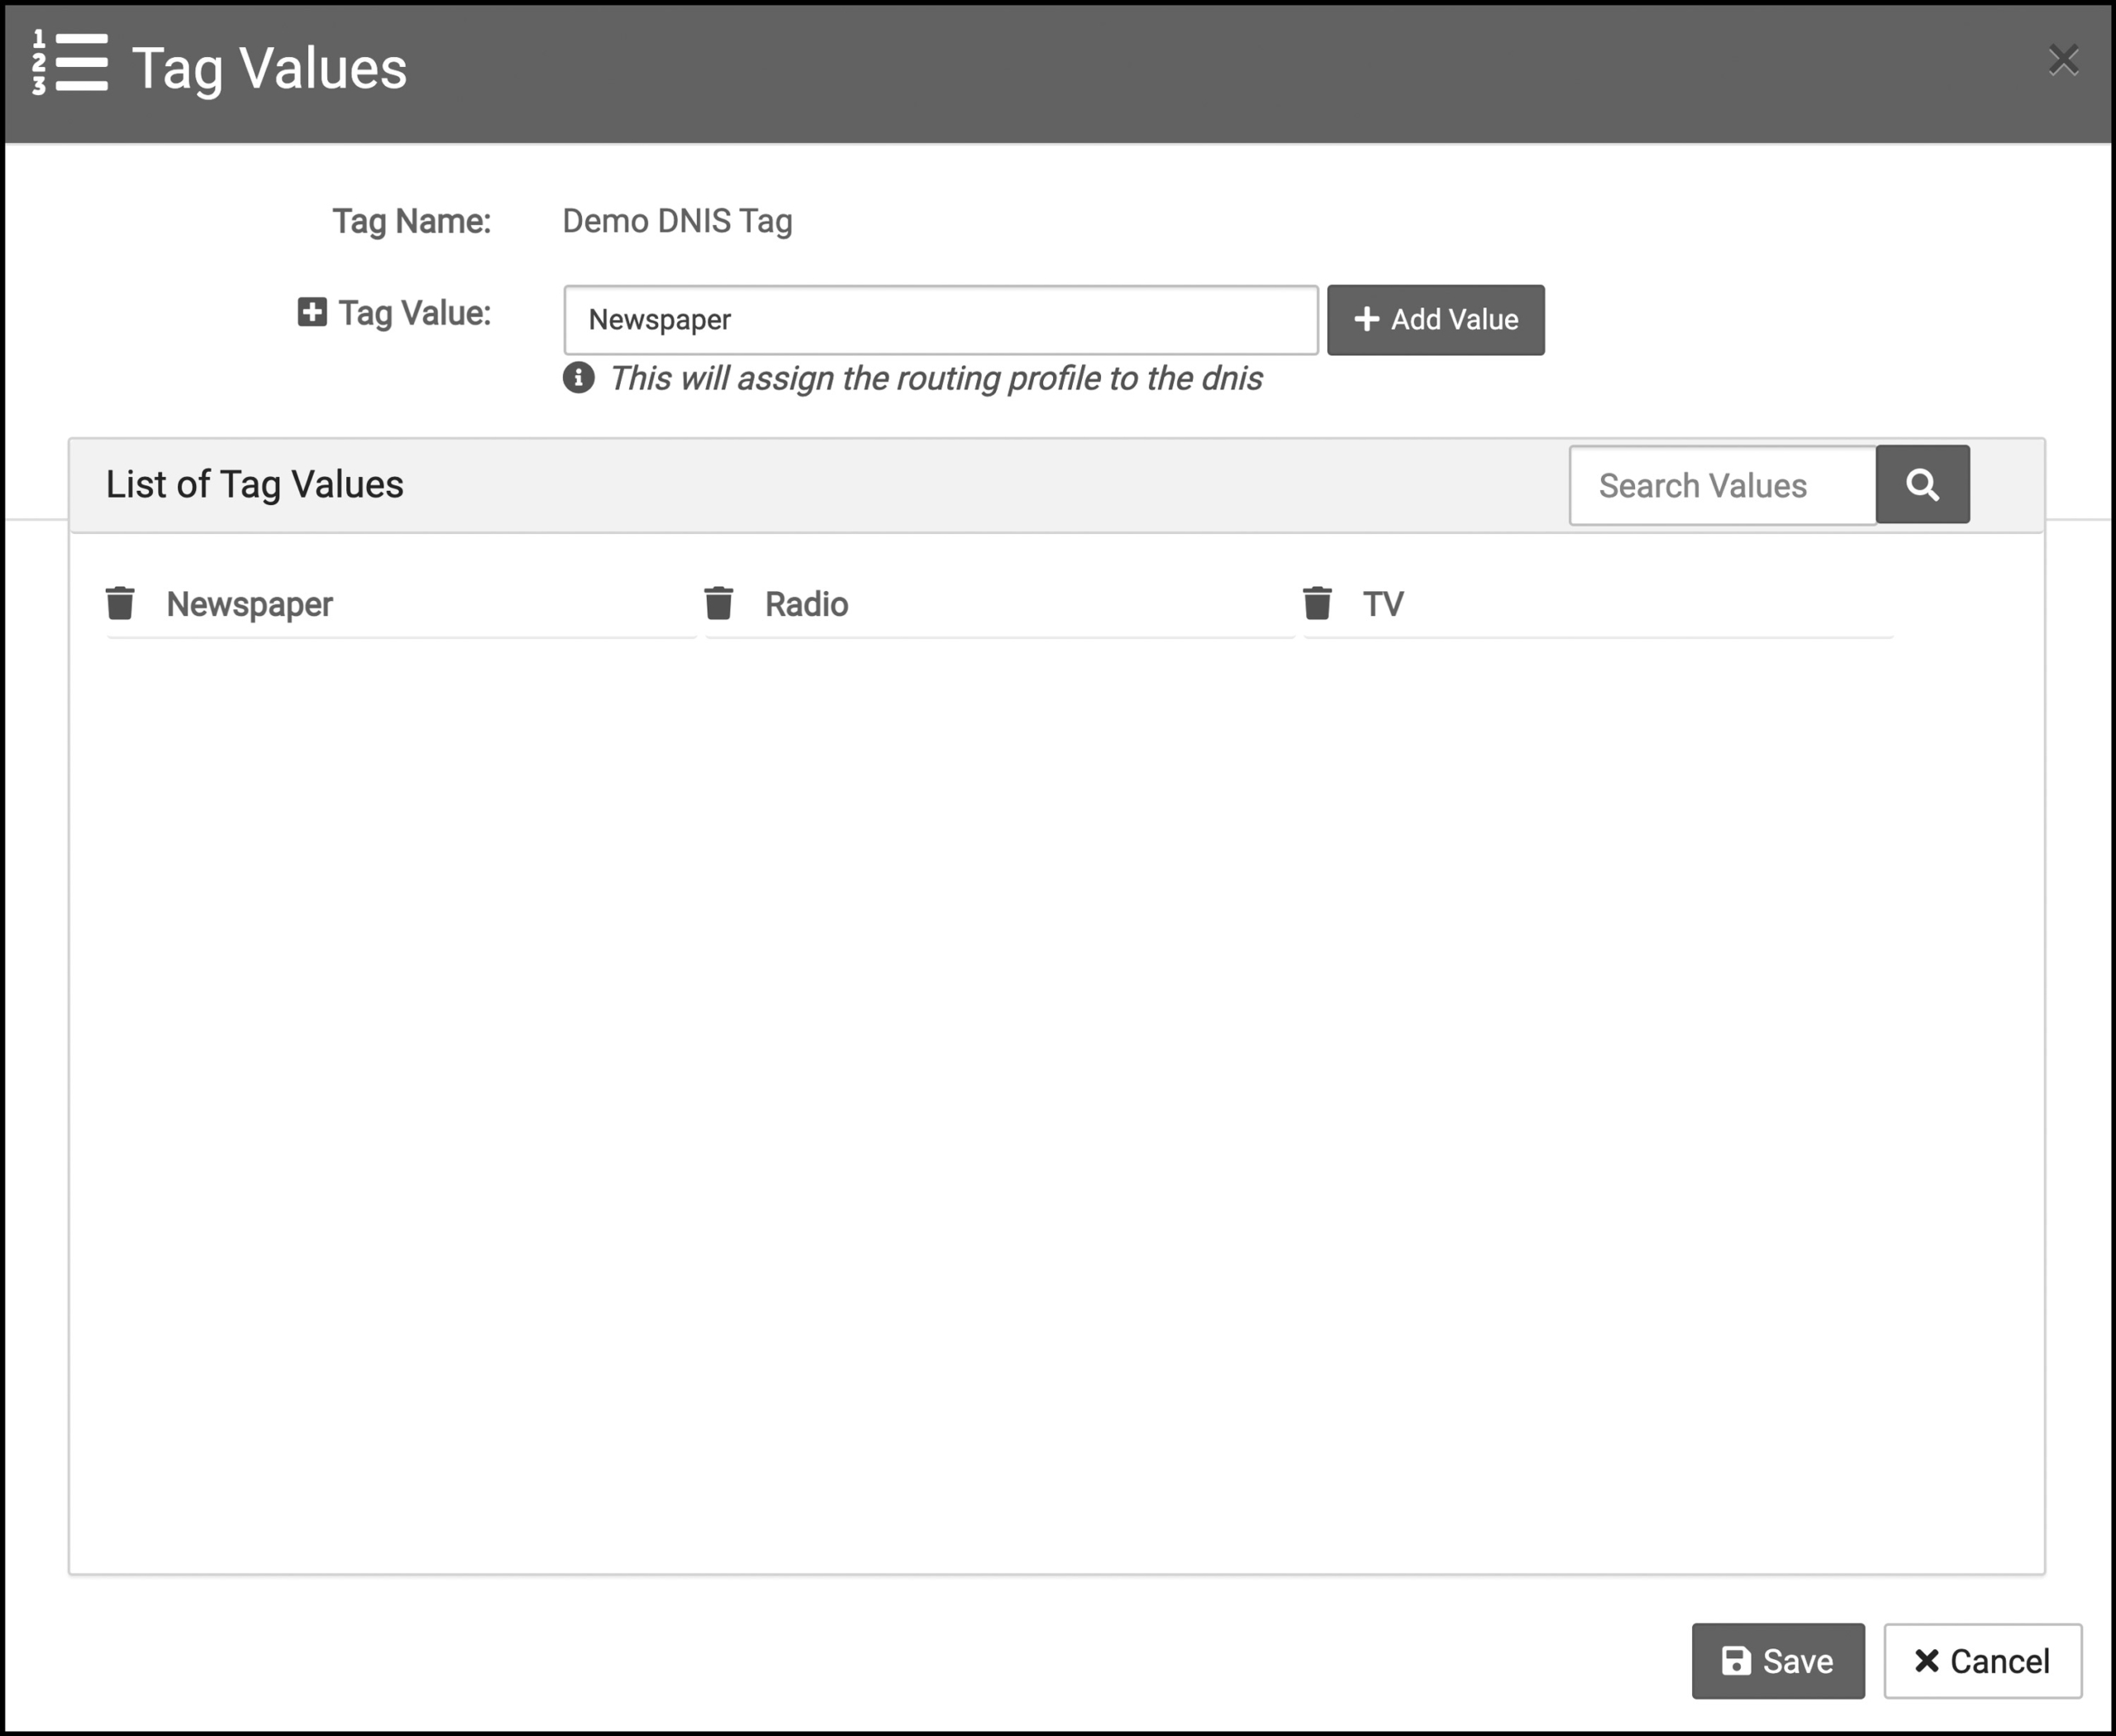
- Add Tag Values to the Tag Group
- Click Save
These values are what will be assigned to specific DNIS in your reports. For example, if you have six different campaigns with a Tag named Campaign Channel, each of the values can be the names of the specific channel. Or if you are running a sale and want to tag Christmas Discounts and then name the values based on the call source, they might be the different radio stations you bought ads on.
Once you have created a DNIS tag, you need to assign it to your numbers (DNIS).
- Navigate to AccuRoute and select Numbers
- Find the DNIS you wish to tag and click the purple Tags icon
- Select the drop-down menu in the Tag to find the value you want to assign (note that there can be more than one tag per DNIS)
- Click Save when you’re done
Using Target Tags
Target Tags are attributes that are directly related to your target number, unlike DNIS tags which are related to the incoming number. Follow these steps to create a target tag:
- Navigate to AccuRoute and select Tags
- Find and select New Tag (in the middle of the screen)
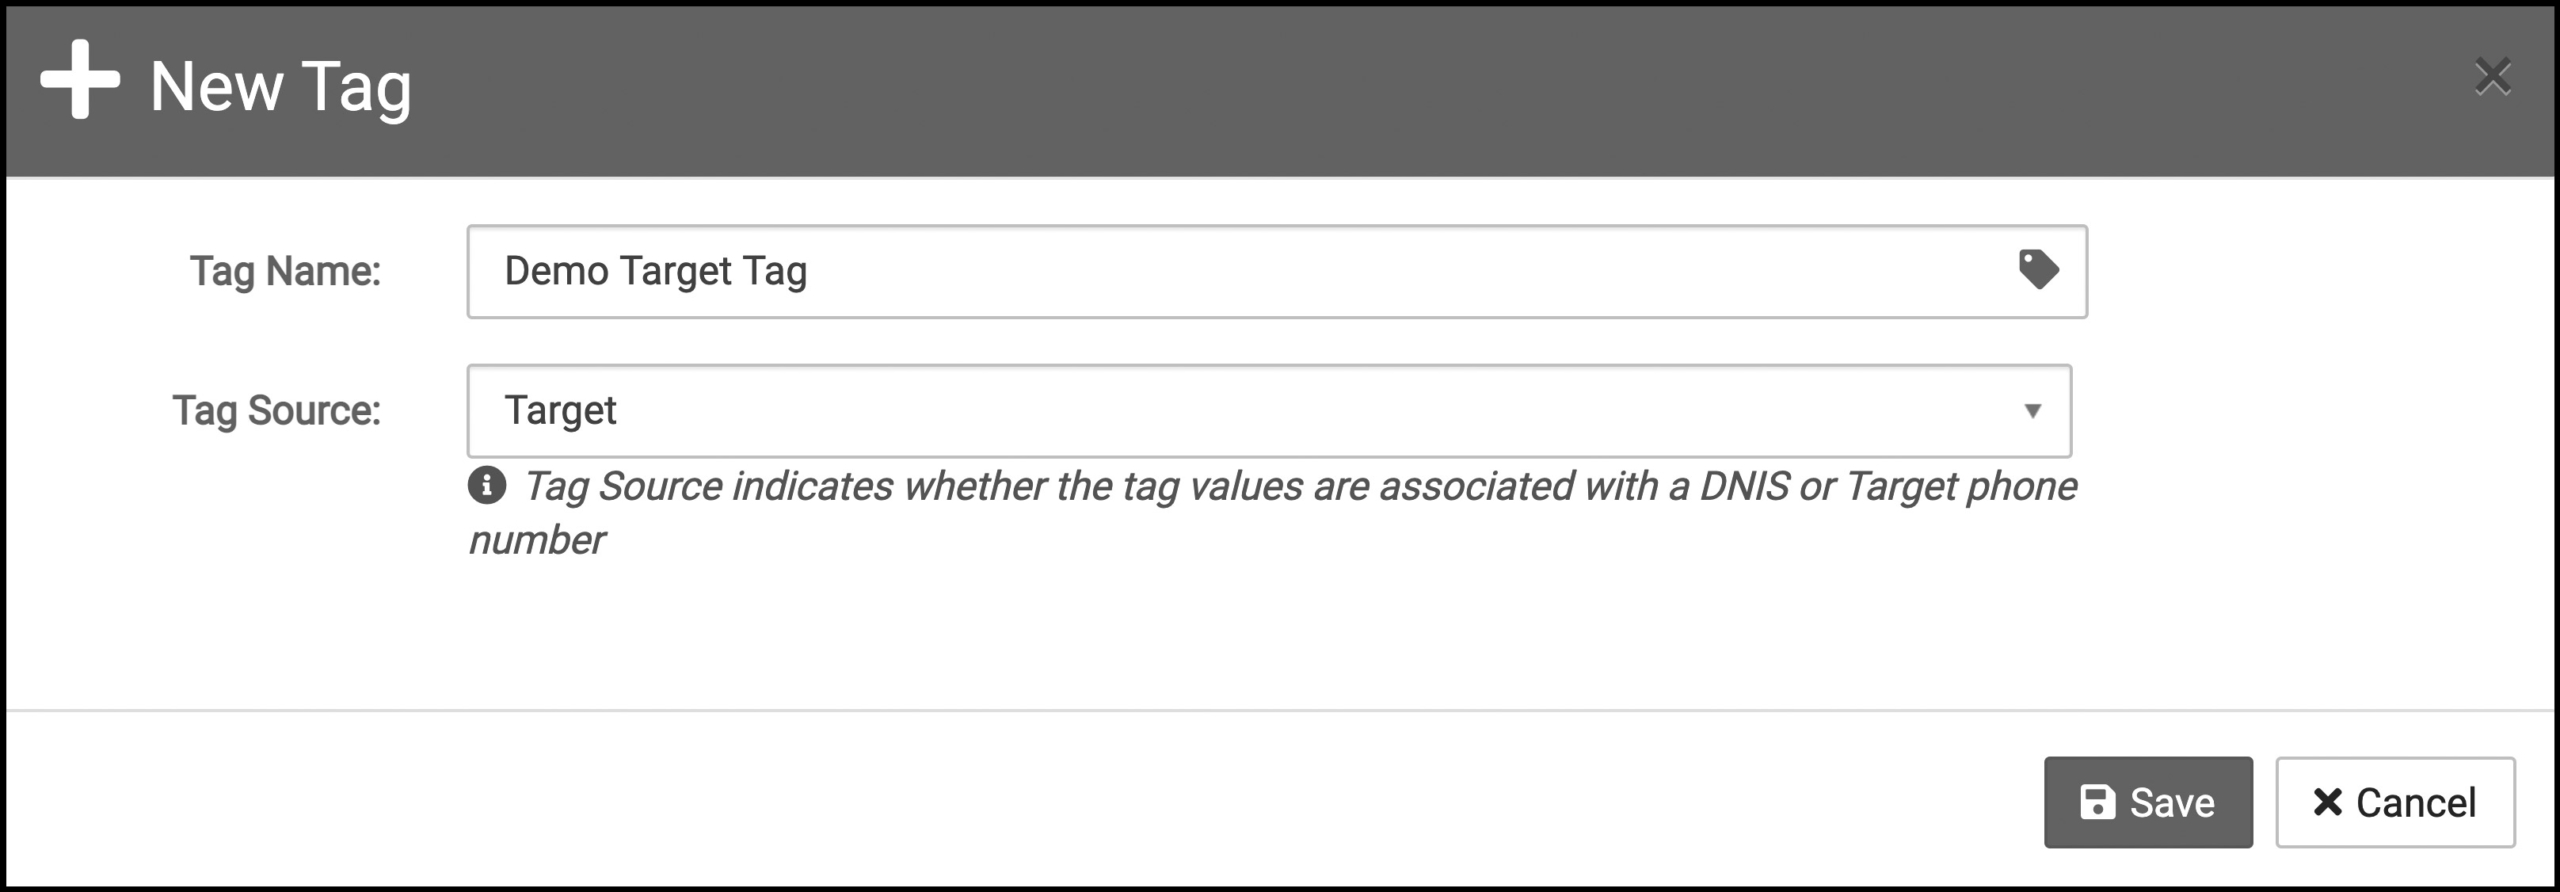
- Set the Tag Name, or the title of the group of tags such as Franchise Locations
- Make sure the tag source is Target
- Once the Tag Name is created, click Save
- Click the Values buttons for the tag you just created
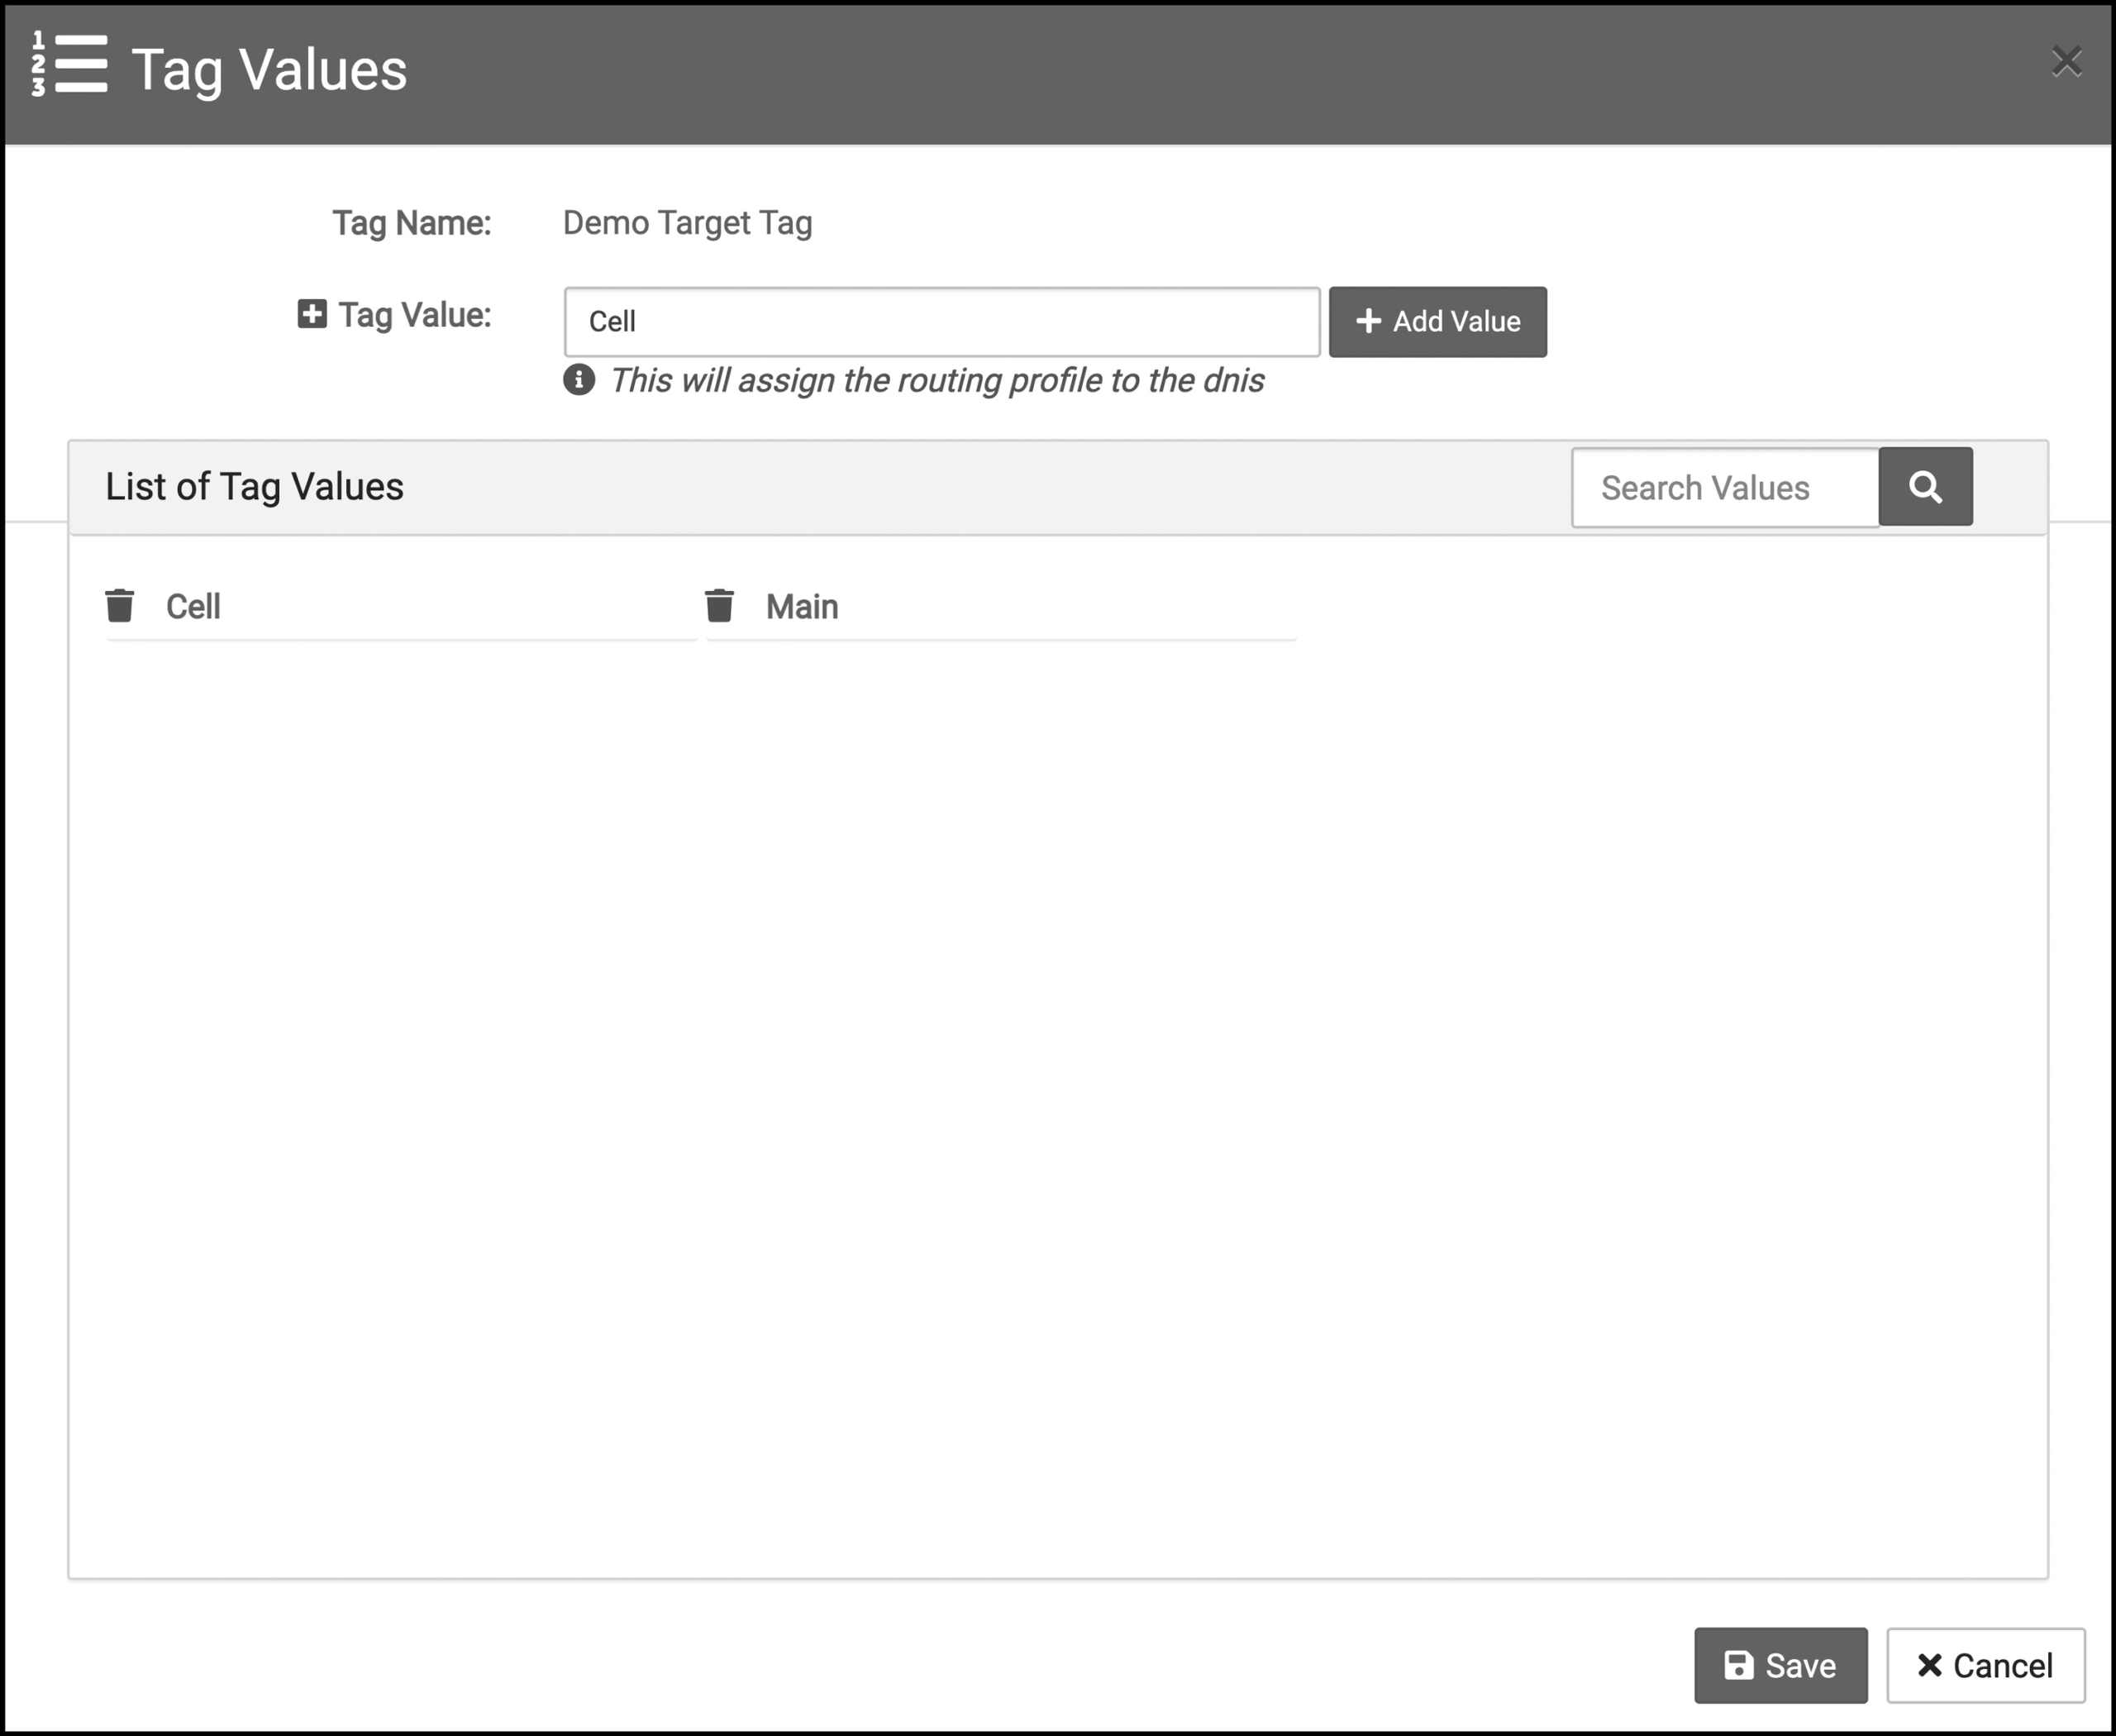
- Add tag values to the tag group
- Click Save
These values are what will be assigned to specific Targets for your inbound calls. For example, if you have six different franchise locations you can create a Franchise Locations tag and set the values as each location so you can track and report on where calls go.
Once you have created Target Tags, you need to assign them.
- Navigate to AccuRoute and select Targets
- Find the target you wish to tag and click the purple Tags icon
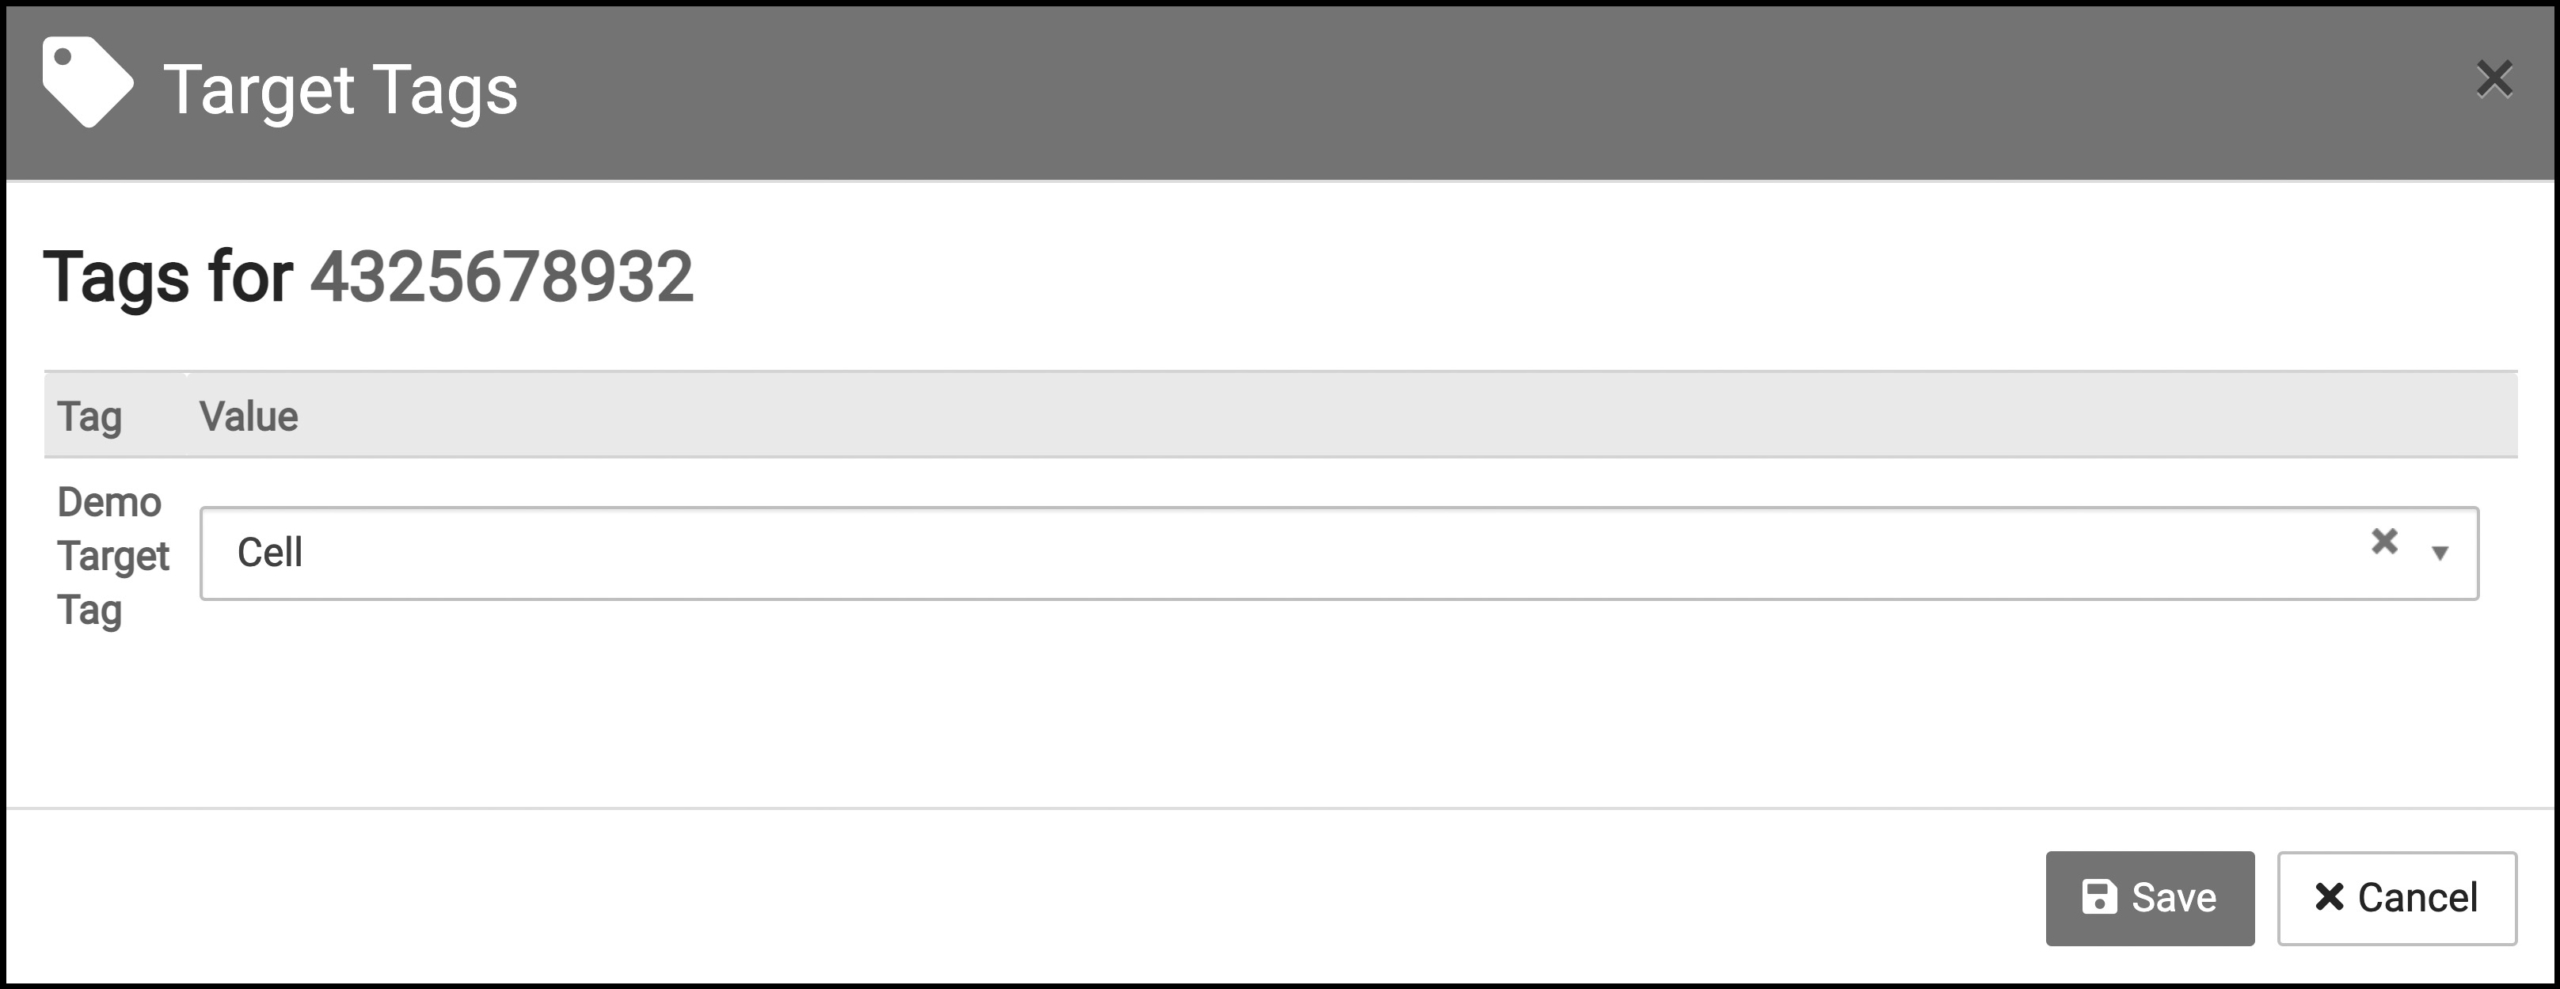
- Select the drop-down menu in the Tag to find the value you want to assign
- Click Save when you’re done
Using Routing Tags
Routing Tags are attributes that are dynamically set during the call-flow execution of a routing profile. These attributes can indicate many things including the results of a decision node, the digit chosen on a menu, the data keyed on a prompt like the caller’s zip code, and more.
Routing tags can be enabled by selecting the Enabled box listed for Routing Tag within any routing profile Action Icon that applies. See the below example to view the enabled box in an Action Icon.
If you wanted to track the selection made by a caller from your IVR menu, for example, you would follow these steps:
- Navigate to AccuRoute and select Routing
- Click the Designer button on the routing profile you want to use with Routing Tags
- Click the Action Icon you’d like to apply Routing Tags to such as Menu, Play Audio, or Input Prompt
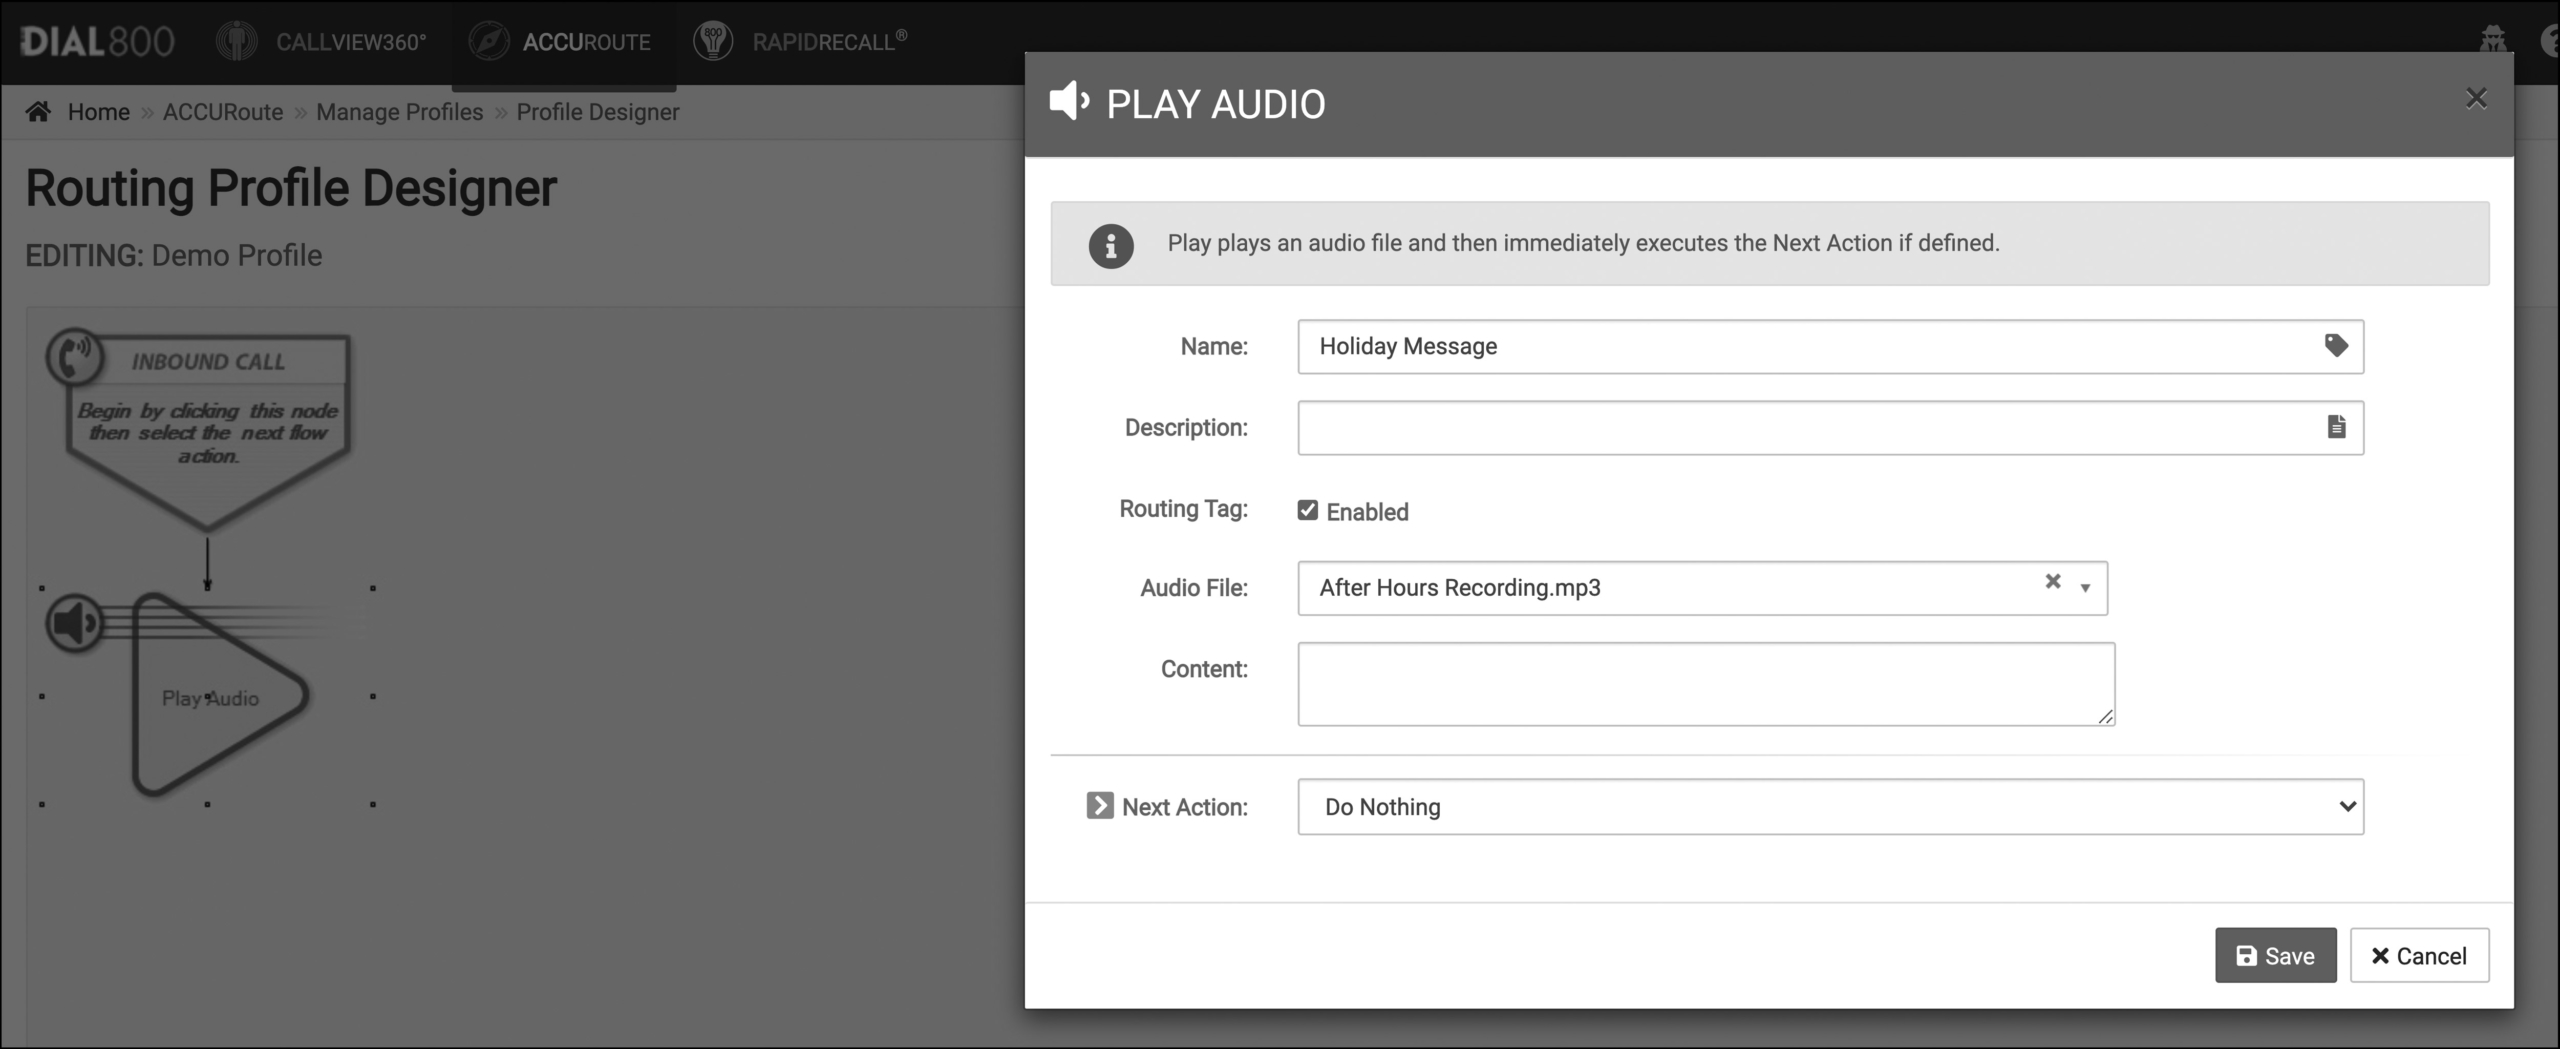
- Within the box that opens for that Action Icon is a line item for Routing Tag – click the box for Enable
- Click Save
Using Web Tags
While web tags are a type of tag, they are not set up and generated the same way as DNIS, Target, and Routing Tags within Dial800.
Web tags are both auto generated and manually created, attaching meaningful digital marketing data points like paid search campaign details and utm parameters to your call records based on digital lead source attribution.
To learn how to set up and utilize web tags, check out this article.
Using Voice Tags
Voice tags are also set up in a different way than DNIS, Target, Routing, or Web tags. Within Dial800’s Voice Tagging AI you can use speech analytics to automatically detect targeted keywords and tag all calls that use those keywords.
There are two ways you can create these voice tagging profiles – using One to One Speech Analytics, or Category Based Speech Analytics. These profiles are easily customized, and you can create multiple voice tagging profiles.
To learn how to set up voice tags, check out this guide.
Viewing Tags in CallView360
Within CallView360, tags can be displayed and included in your call data within the Calls screen or by using custom dashboards or reports.
To access the Calls screen, login and navigate to CallView360 and click on the Calls option in the top right corner. This will pull up the default Calls view, which you can then filter more to find the tag and call data you need.
If you want to see tag information on a KPI dashboard, follow these steps:
- Navigate to Callview360
- Click the black arrow on the left side of the screen
- Select the pen and paper Edit icon to the right of the name of your dashboard
- Select the widget overhead group to add to the dashboard
- Choose an option that includes a “by ____ tag”
- Click the top right corner of the added widget to select the Edit icon
- Within Widget Data Options, click the 2nd drop down menu and select the “by ____ tag” you wish to add
- Once you hit save, the tracking of these tags will be displayed in the graph
For more information on building your own custom dashboard, click here.
With CallView360 reporting, you have two ways of viewing tag information – you can filter reports by a Tag, or you can choose specific tags to report on across all calls.
Follow these steps to filter your reports by specific tags, showing only calls with that tag:
- Follow through your report creation until you get to the Filters step (Step2)
- Select the Tags option
- Select the type of tag you wish to filter all calls by for this report
- Type out the name of the Tag(s) you wish to select
- Click Ok
Follow these steps to add specific tags in a custom column within your report:
- Follow through your report creation until you get to the Options step (Step 3)
- Select Advanced for Template Type
- Select + Add Column
- Under the 2nd drop menu for Data Value, select Specific Tag
- An additional dropdown menu will pop for Tag Value; Select the Tag Value you wish to apply
- Click Save
For more information on building custom reports, click here.
Your tags are now created and ready to be tracked in Dial800. If you have any more questions or need help, contact Dial800 Customer Care or call 1-800-DIAL800.
 CallView360®
 VoiceInsights AI
 AccuRoute®
 BizCloud
 RapidRecall®
 Integrations